
Last week I girded up my loins, picked up my scissors, and cut my sweater in half. Done with careful preparation, I survived, the sweater survived – and in fact it was much improved by the process.
The Problem
Here’s how knitwear design works for me: I try something. I like it. Well, except for just one thing. I rip back. I re-knit, and now it’s much better. But it’s not quite right, let me try this other color. At some point, I will determine to knit on no matter what. In the case of the Colorwork Tee, I knit the entire sweater before determining that, although I loved the torso of the sweater, I wasn’t happy with the fit of the yoke and sleeves.
So, I began again, armed with better numbers. This time, things were much better! The fit was much more flattering.

I’m not even going to show you the old yoke and sleeves, but here’s the section of the first sweater that I loved and kept. I could have continued knitting from the new yoke and sleeves and have knit all those rounds again, but…I thought that I had a better idea…grafting!

The Plan
The plan was that, using Kitchener stitch, I would graft the top and bottom sections together. It would be an elegant solution that would save both time and yarn.

Careful preparation was key to a successful operation. My motto, to misquote Bob Vila, was “Measure twice, stitch once!”
The Procedure
A Lifeline
~I learned this technique from a sock pattern, Basic Sock by Churchmouse Yarns and Teas. Insert the needle into the first leg of each stitch. After the needle has been inserted into every stitch, the yarn can be unraveled down to the needle and the live stitches will remain on the needle.

Helpful hint for seeing the “first leg” of each stitch: use finger to push out the fabric. You can see the separate legs more easily. I also find color changes to be helpful in seeing the separate legs.

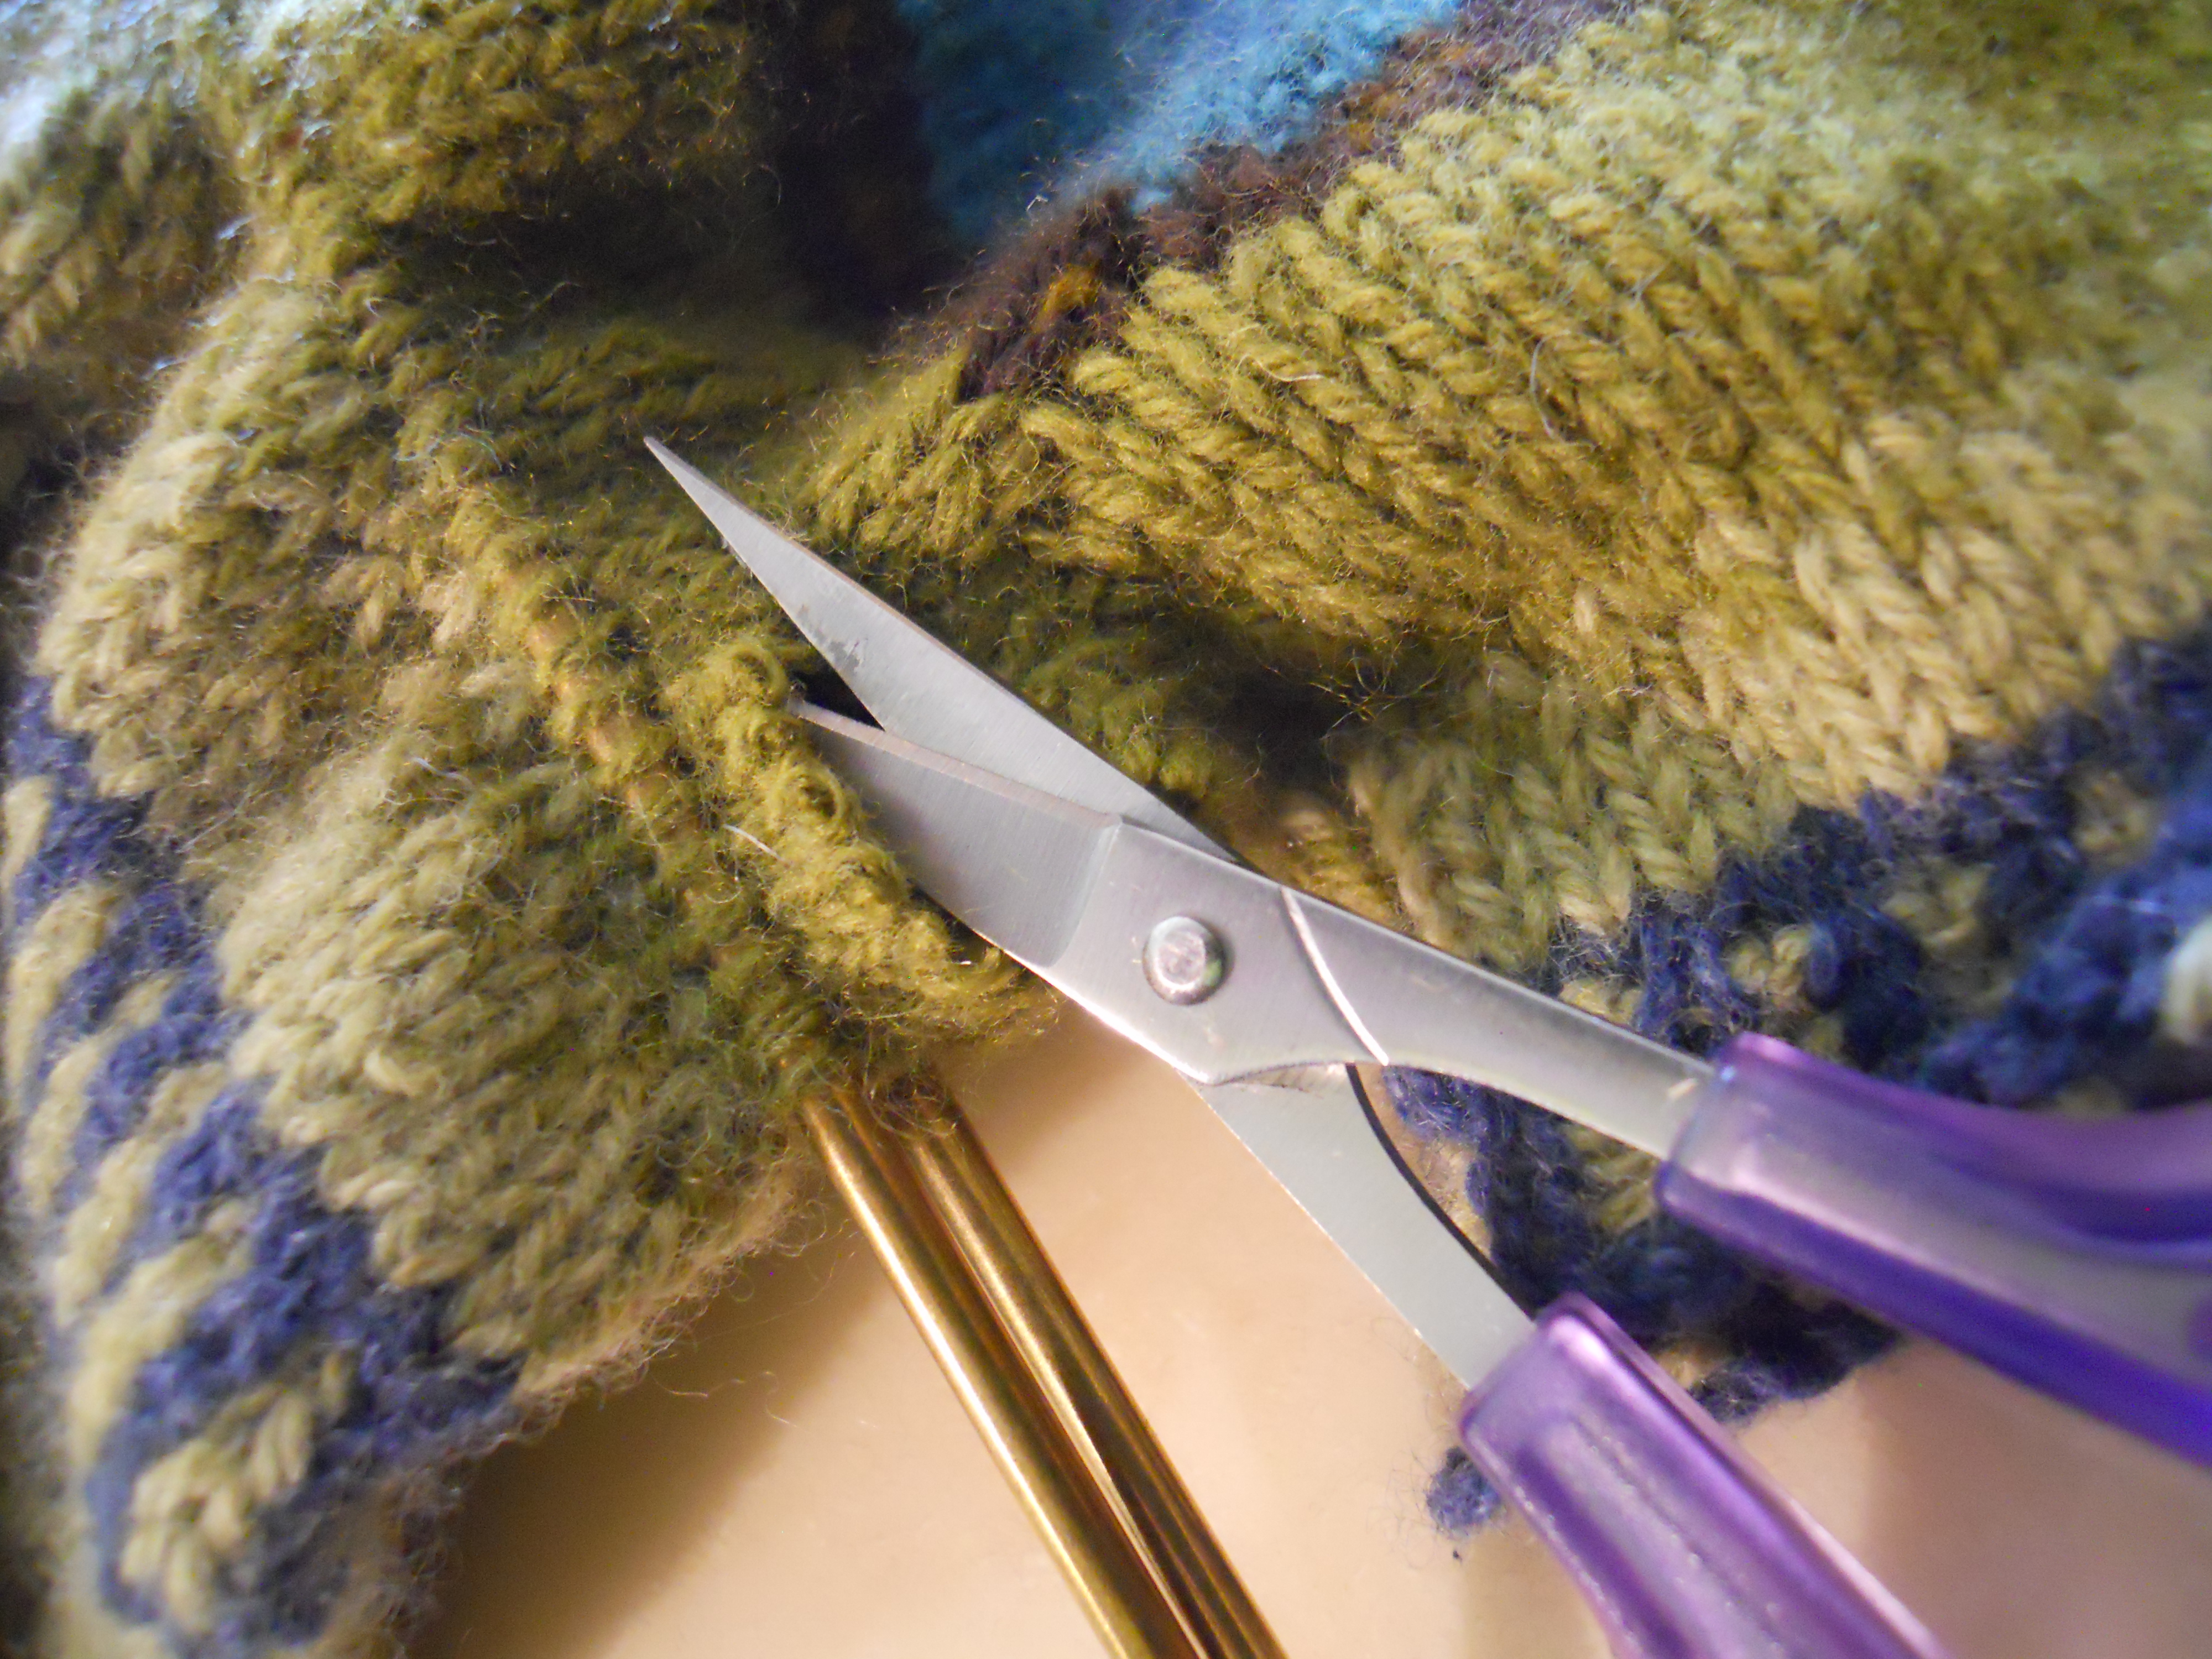
After all of the stitches are on the needles…

…the fabric is ready to cut:

There was some weird problem unraveling, so I put in a new lifeline a few rounds further down.

Now I was ready to begin stitching. For instructions and a cheat sheet on how to work the Kitchener Stitch, read here.
Here, about 3 inches of grafting is completed (to the right of the needles):
After grafting, there was a bit of a ridge, noticeable to the touch but not visible. Once blocked, though, it was practically imperceptible.
The Finished Product
I’m excited to share some much more professional looking photos soon, but here’s the sweater right after blocking.

And that’s how I grafted 312 stitches and lived to tell about it!
That is something I thought would be impossible. What a beautiful sweater! I am in awe about how quickly your projects are complete and so intricate. LOL! Apple tree grafting is what Mike and I just learned how to do a few weeks ago. It is basic and quick. Just takes longer to see the result! Love, Linda
>
Thank you, Linda! It was scary, but I took my time with it, did my homework first, counted to make sure I had all the stitches, and was very careful about all the steps. Tree grafting seems very interesting! 🙂
Man, you were brave! What a great way to save the parts you liked and put them together. It looks flawless. I love the diamond part. Hanging in the window like that make the tee look light and it doesn’t look like the weight of a stranded garment.
Thank you! It really is amazing yarn (Sunday Knits Yarn, 3-ply) and makes for a very light and comfy sweater. I will write more about the yarn when I post about testing and also when the pattern is released.
You are much braver then I. It’s an awesome sweater!
Thank you! Or maybe I just REALLY wanted it to be done! 🙂
Woo-hoo! Looks beautiful!
Oh, thank you!!!
I read this on my email when you posted it but only just now had the chance to comment. Beautifully done! And so gutsy! The sweater looks exquisite.
Thank you Alex! I so appreciate the kind words!
I had a bug attack that affected the cast-on and first few rows of a sleeve cuff. I unravelled where the strands broke, knitted a new partial cuff (in the round) and am grafting it on right now. Only 52 stitches, but in rib!
Grafting certainly can save a lot of work! Ribbing would be a bit more difficult, but definitely worth it, I would think.
Sorry about the bug attack! 🙁 Thanks for sharing! 🙂
Lovely! What a great idea that could be incorporated into sweater surgery.
Thank you!