All right! I love this week’s photo challenge! I have wanderlust, and I have it bad. I’ve had it since childhood, when my parents would drive the three of us across the country in our camper from Kentucky to California each summer to visit my grown sisters and their families. I would spend the hours mesmerized by the changing landscape or playing navigator for my dad. Such wonderful memories!
These days I don’t have to travel far to satisfy my need to wander. As you know, if you follow this blog, trips to the Oregon Coast often provide the opportunity for solitary rambles and new discoveries.
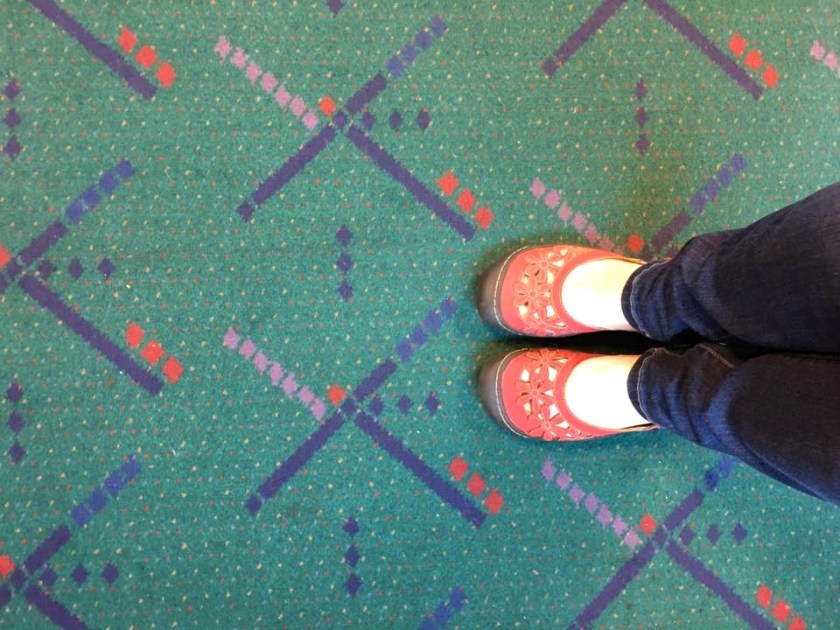
However, for this week’s challenge, the first image that popped into my mind was the iconic PDX (Portland International Airport) carpet. Locals often take pics like these when leaving for new trips or when arriving home. The carpet was replaced a few years ago, but if you know where to wander, you can still find a section of the original pattern. This is the original design.
Last week I girded up my loins, picked up my scissors, and cut my sweater in half. Done with careful preparation, I survived, the sweater survived – and in fact it was much improved by the process.
The Problem
Here’s how knitwear design works for me: I try something. I like it. Well, except for just one thing. I rip back. I re-knit, and now it’s much better. But it’s not quite right, let me try this other color. At some point, I will determine to knit on no matter what. In the case of the Colorwork Tee, I knit the entire sweater before determining that, although I loved the torso of the sweater, I wasn’t happy with the fit of the yoke and sleeves.
So, I began again, armed with better numbers. This time, things were much better! The fit was much more flattering.
New yoke and sleeves
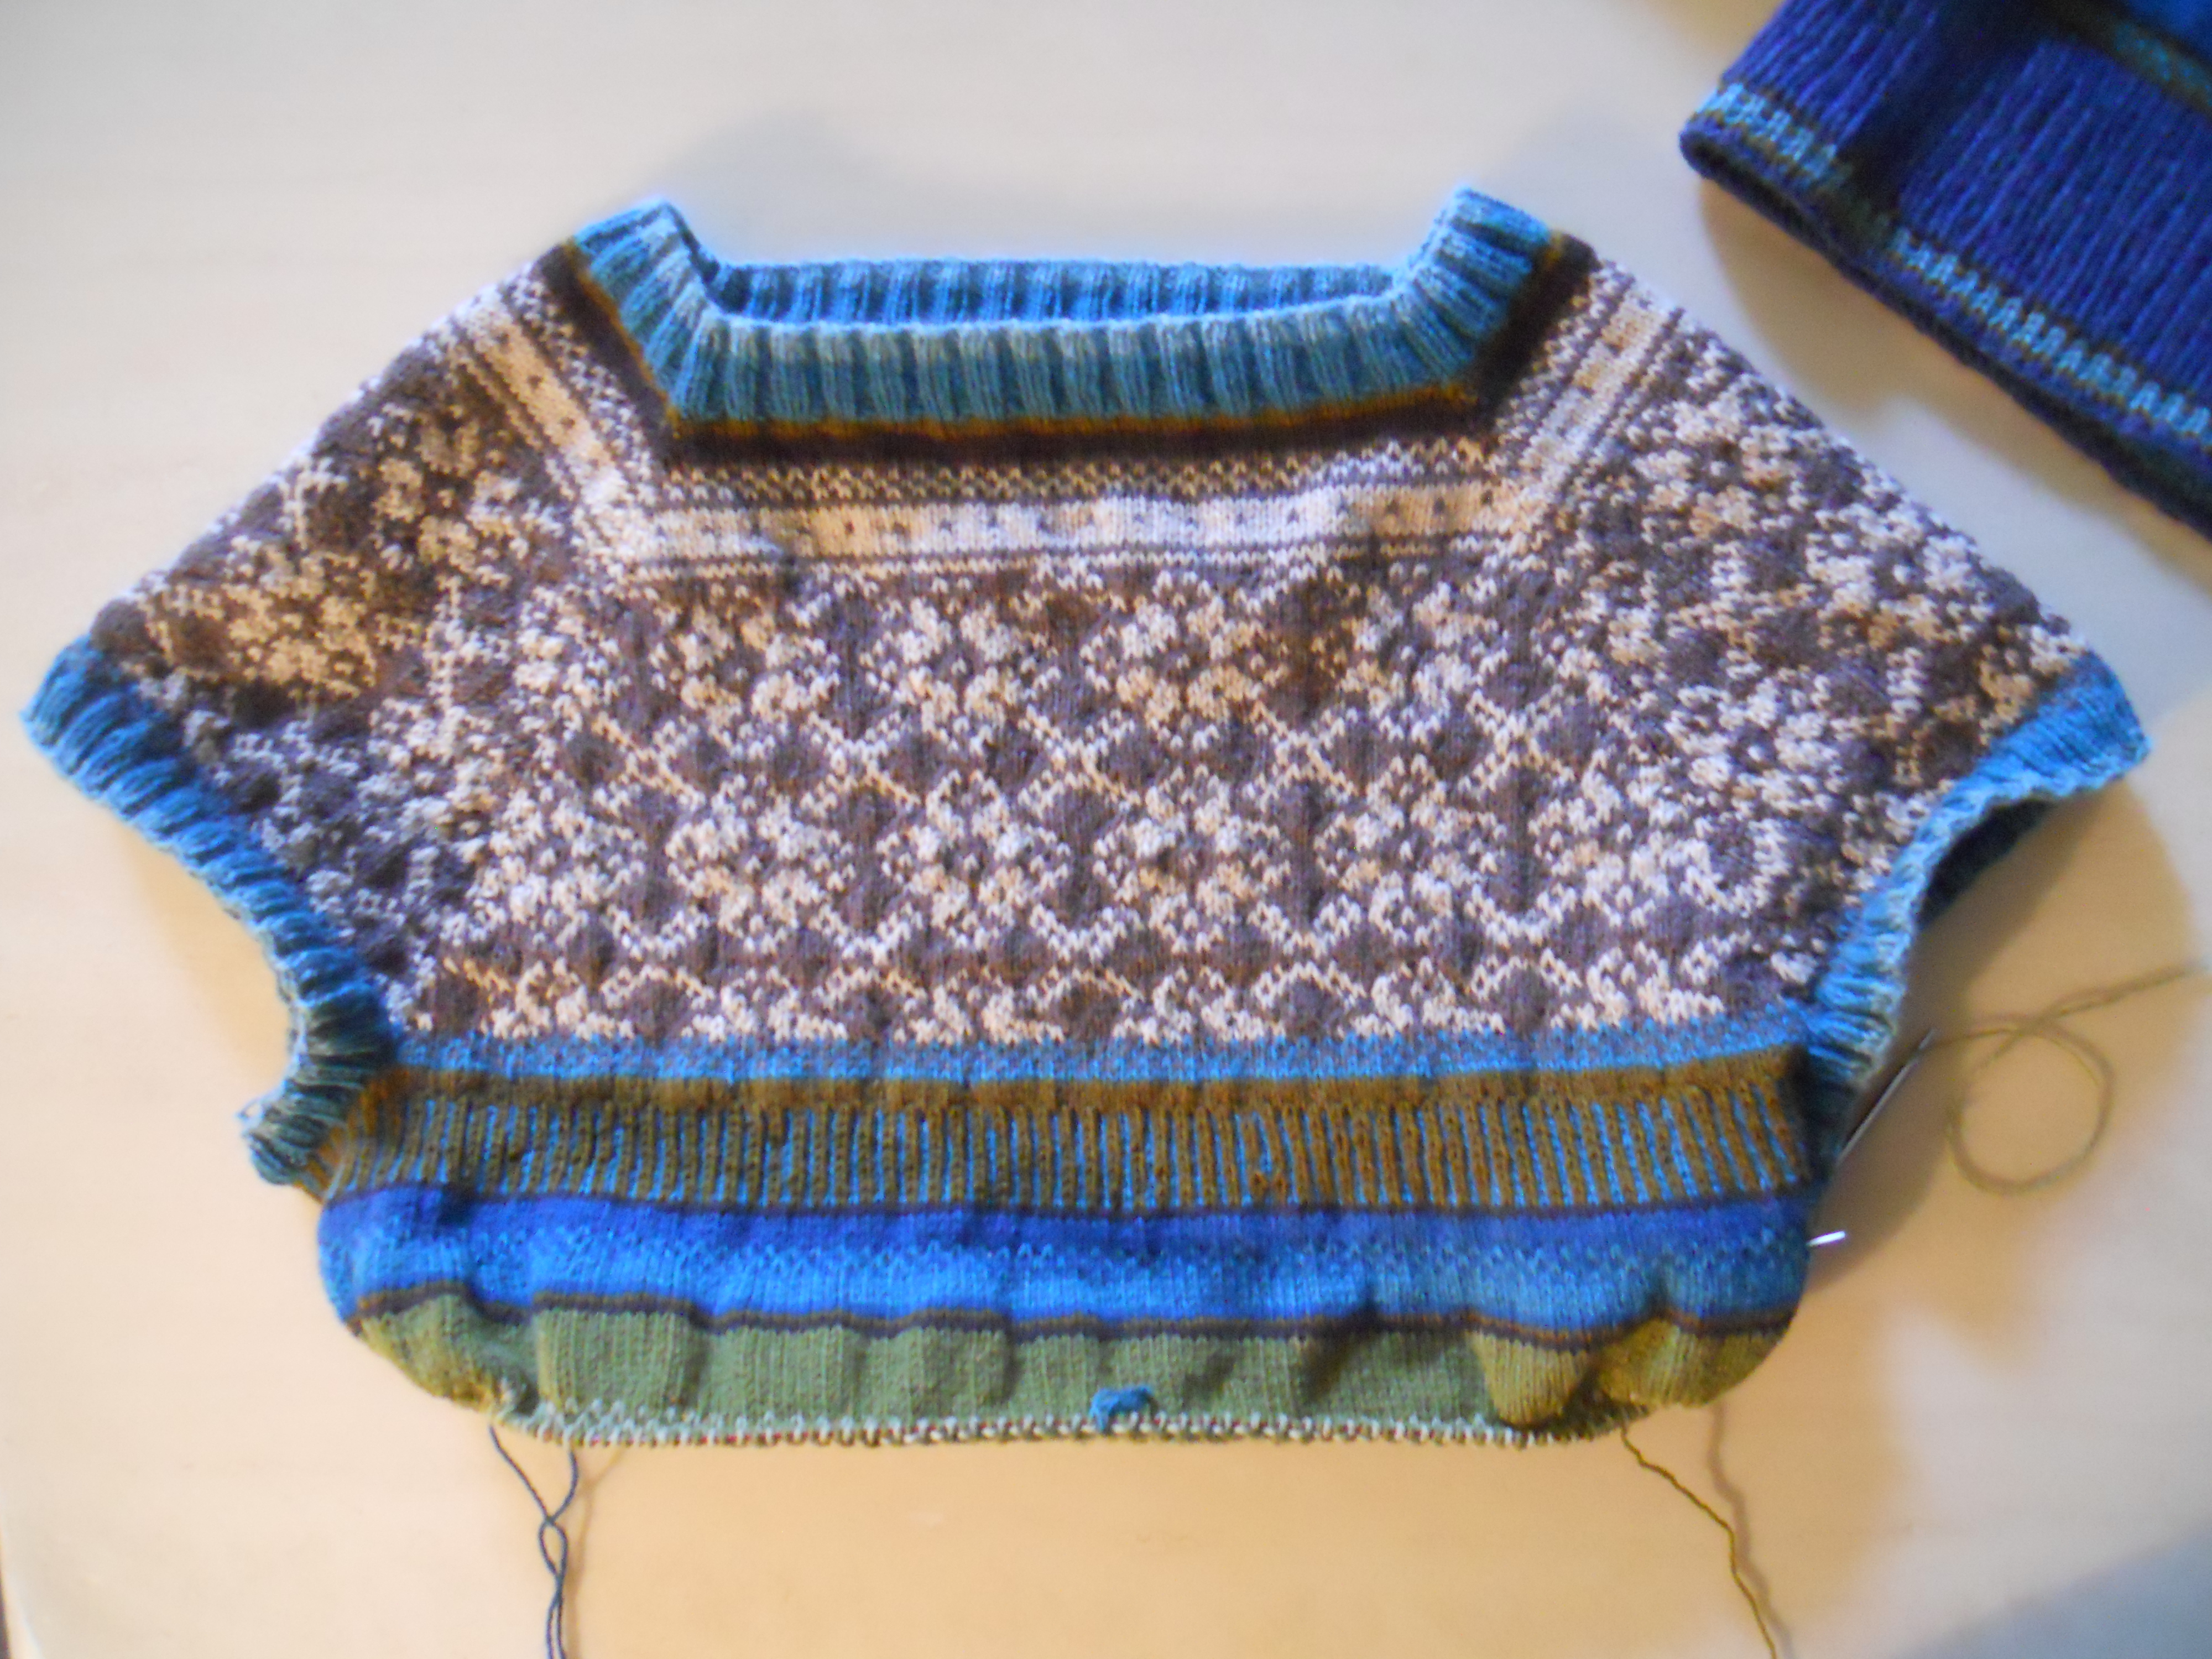
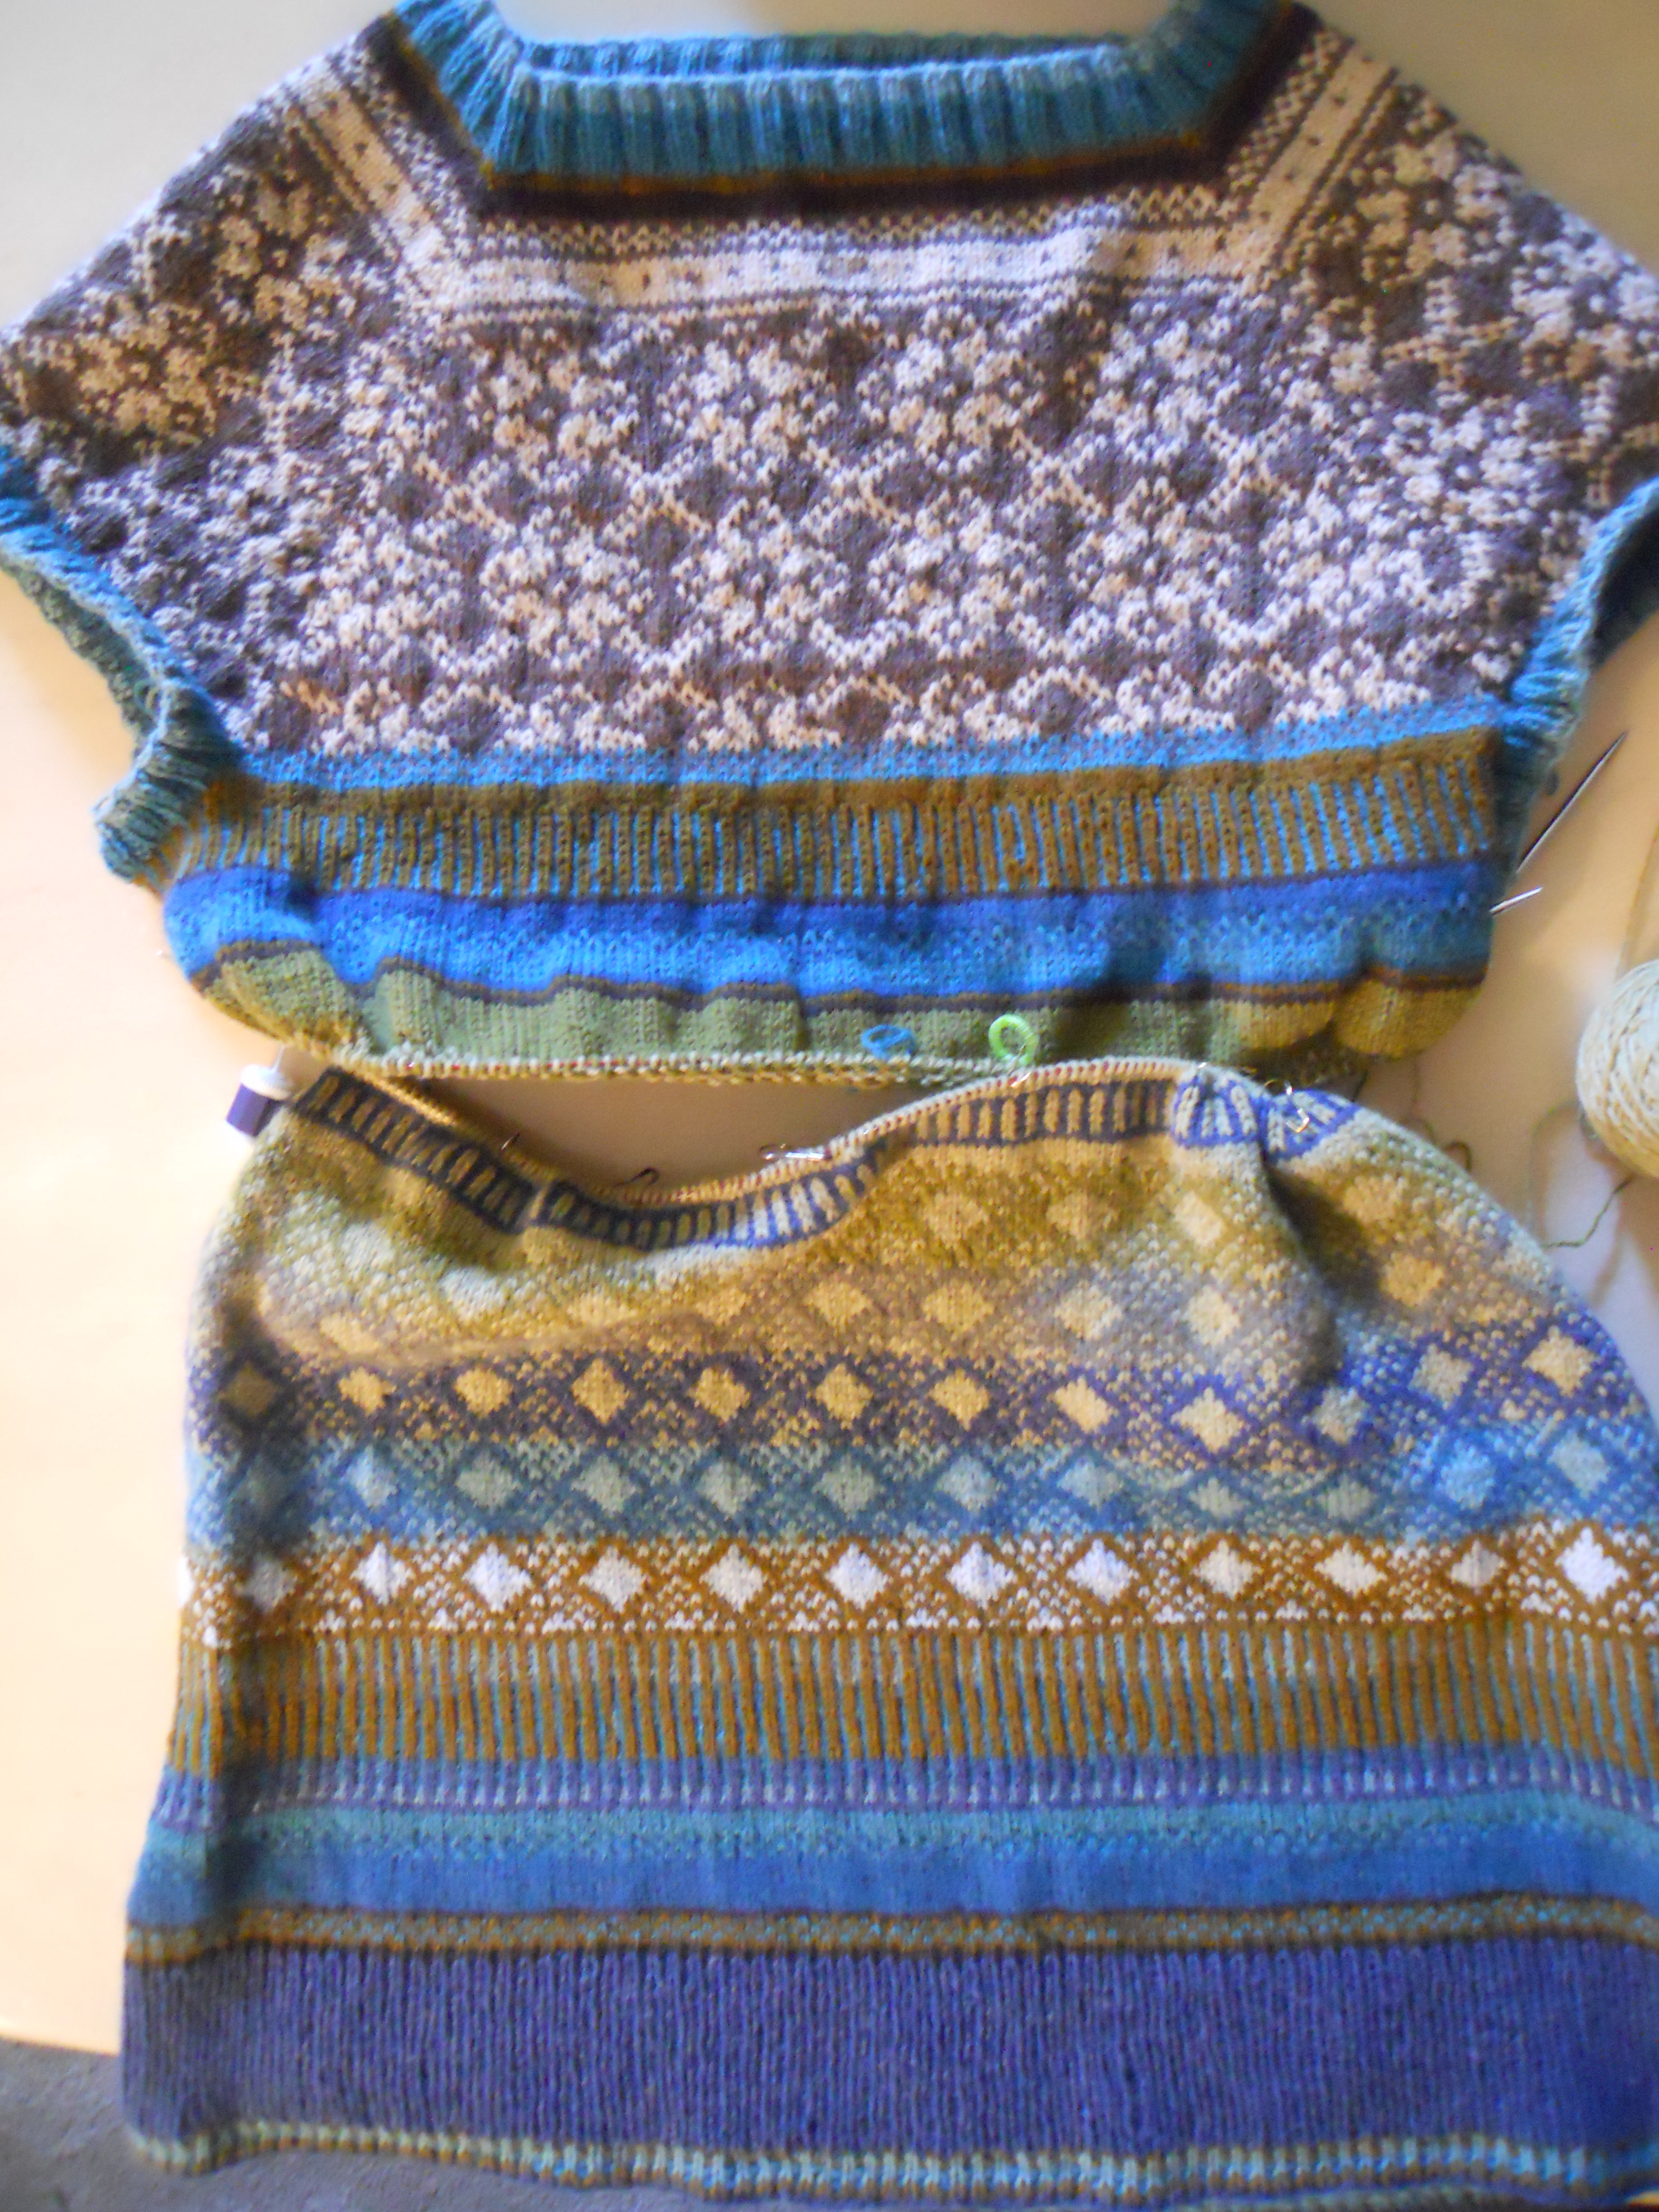
I’m not even going to show you the old yoke and sleeves, but here’s the section of the first sweater that I loved and kept. I could have continued knitting from the new yoke and sleeves and have knit all those rounds again, but…I thought that I had a better idea…grafting!
The Plan
The plan was that, using Kitchener stitch, I would graft the top and bottom sections together. It would be an elegant solution that would save both time and yarn.
Careful preparation was key to a successful operation. My motto, to misquote Bob Vila, was “Measure twice, stitch once!”
The Procedure
A Lifeline
~I learned this technique from a sock pattern, Basic Sock by Churchmouse Yarns and Teas. Insert the needle into the first leg of each stitch. After the needle has been inserted into every stitch, the yarn can be unraveled down to the needle and the live stitches will remain on the needle.
Helpful hint for seeing the “first leg” of each stitch: use finger to push out the fabric. You can see the separate legs more easily. I also find color changes to be helpful in seeing the separate legs.
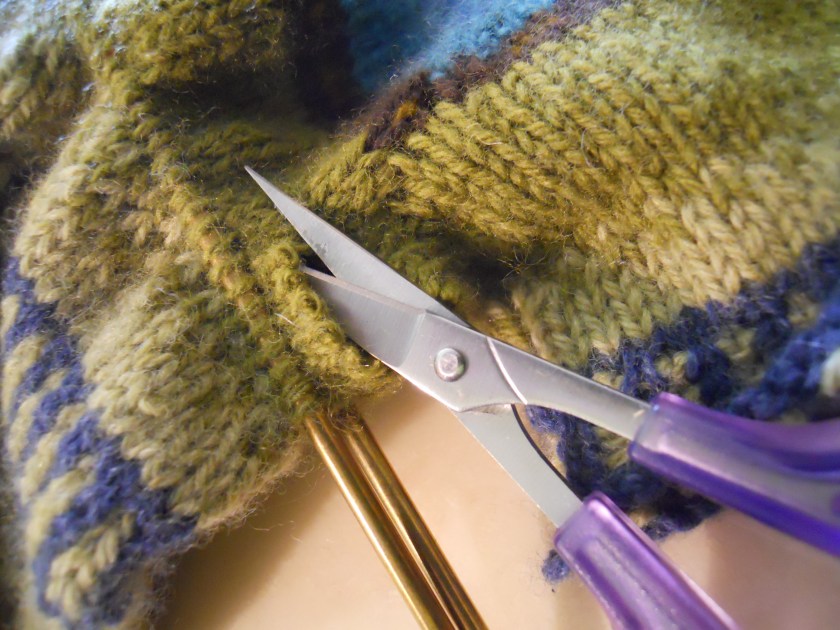
After all of the stitches are on the needles…
…the fabric is ready to cut:
Eek!!!
There was some weird problem unraveling, so I put in a new lifeline a few rounds further down.
Now I was ready to begin stitching. For instructions and a cheat sheet on how to work the Kitchener Stitch, read here.
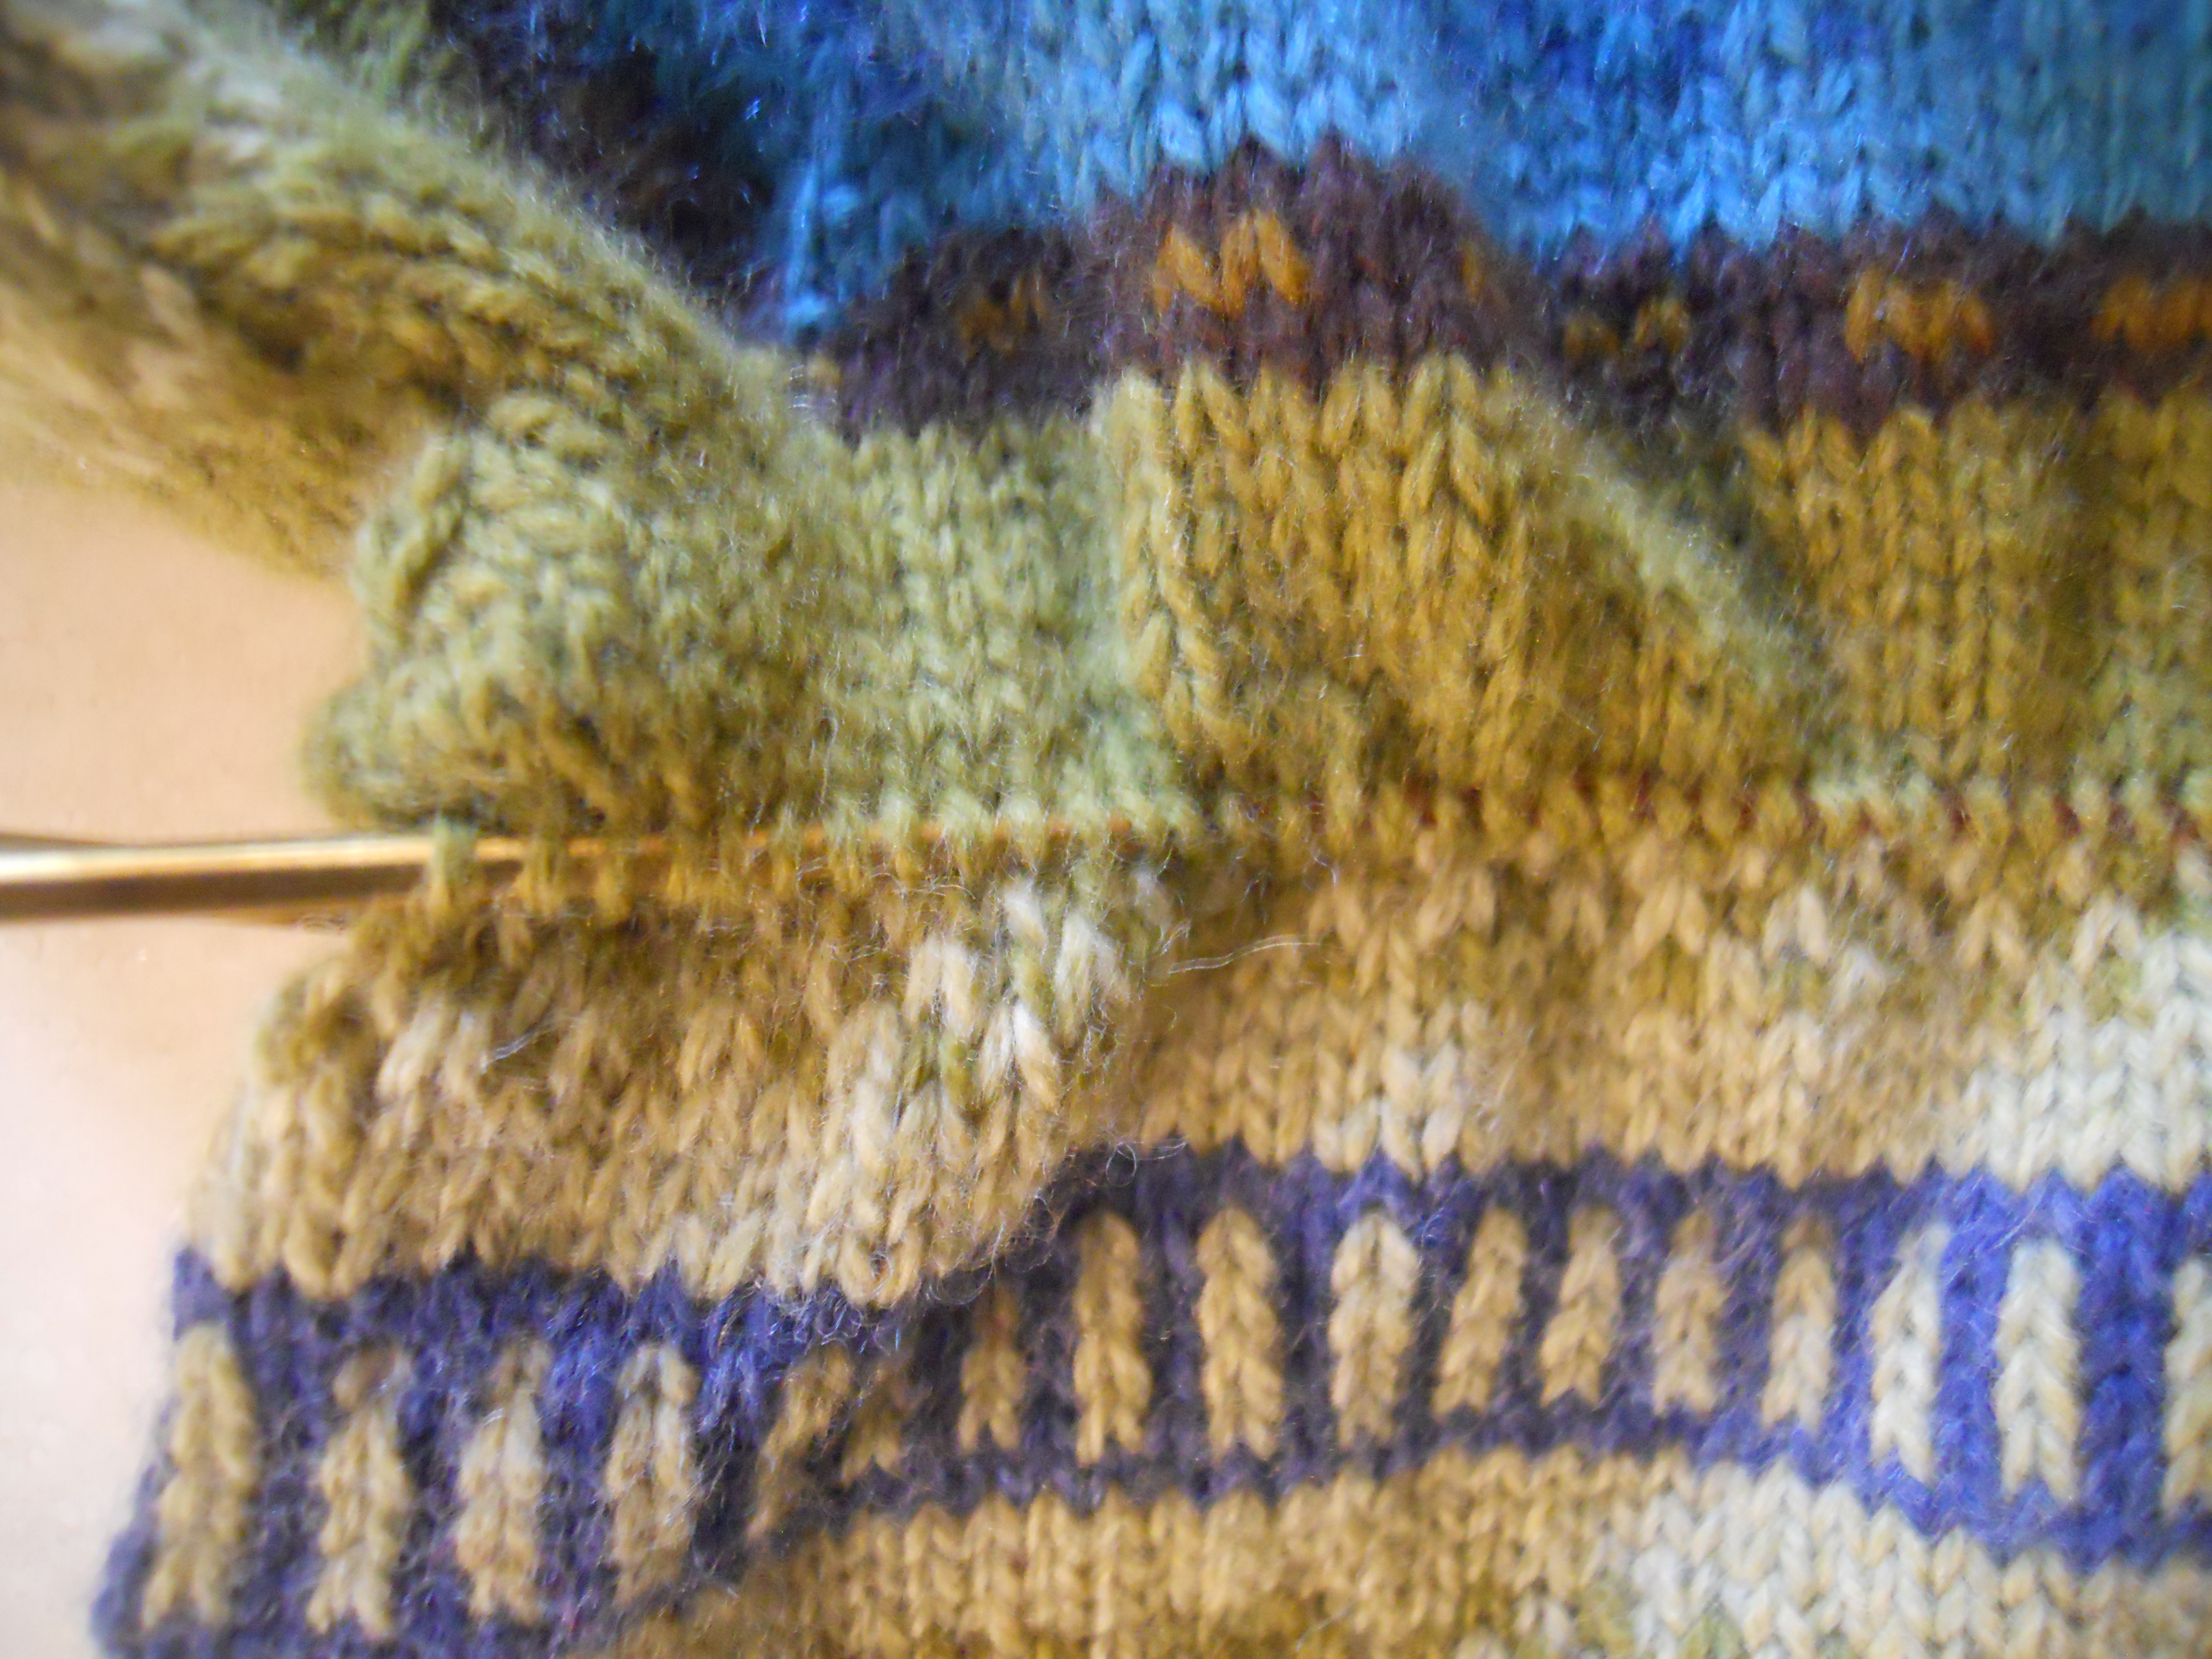
Here, about 3 inches of grafting is completed (to the right of the needles):
After grafting, there was a bit of a ridge, noticeable to the touch but not visible. Once blocked, though, it was practically imperceptible.
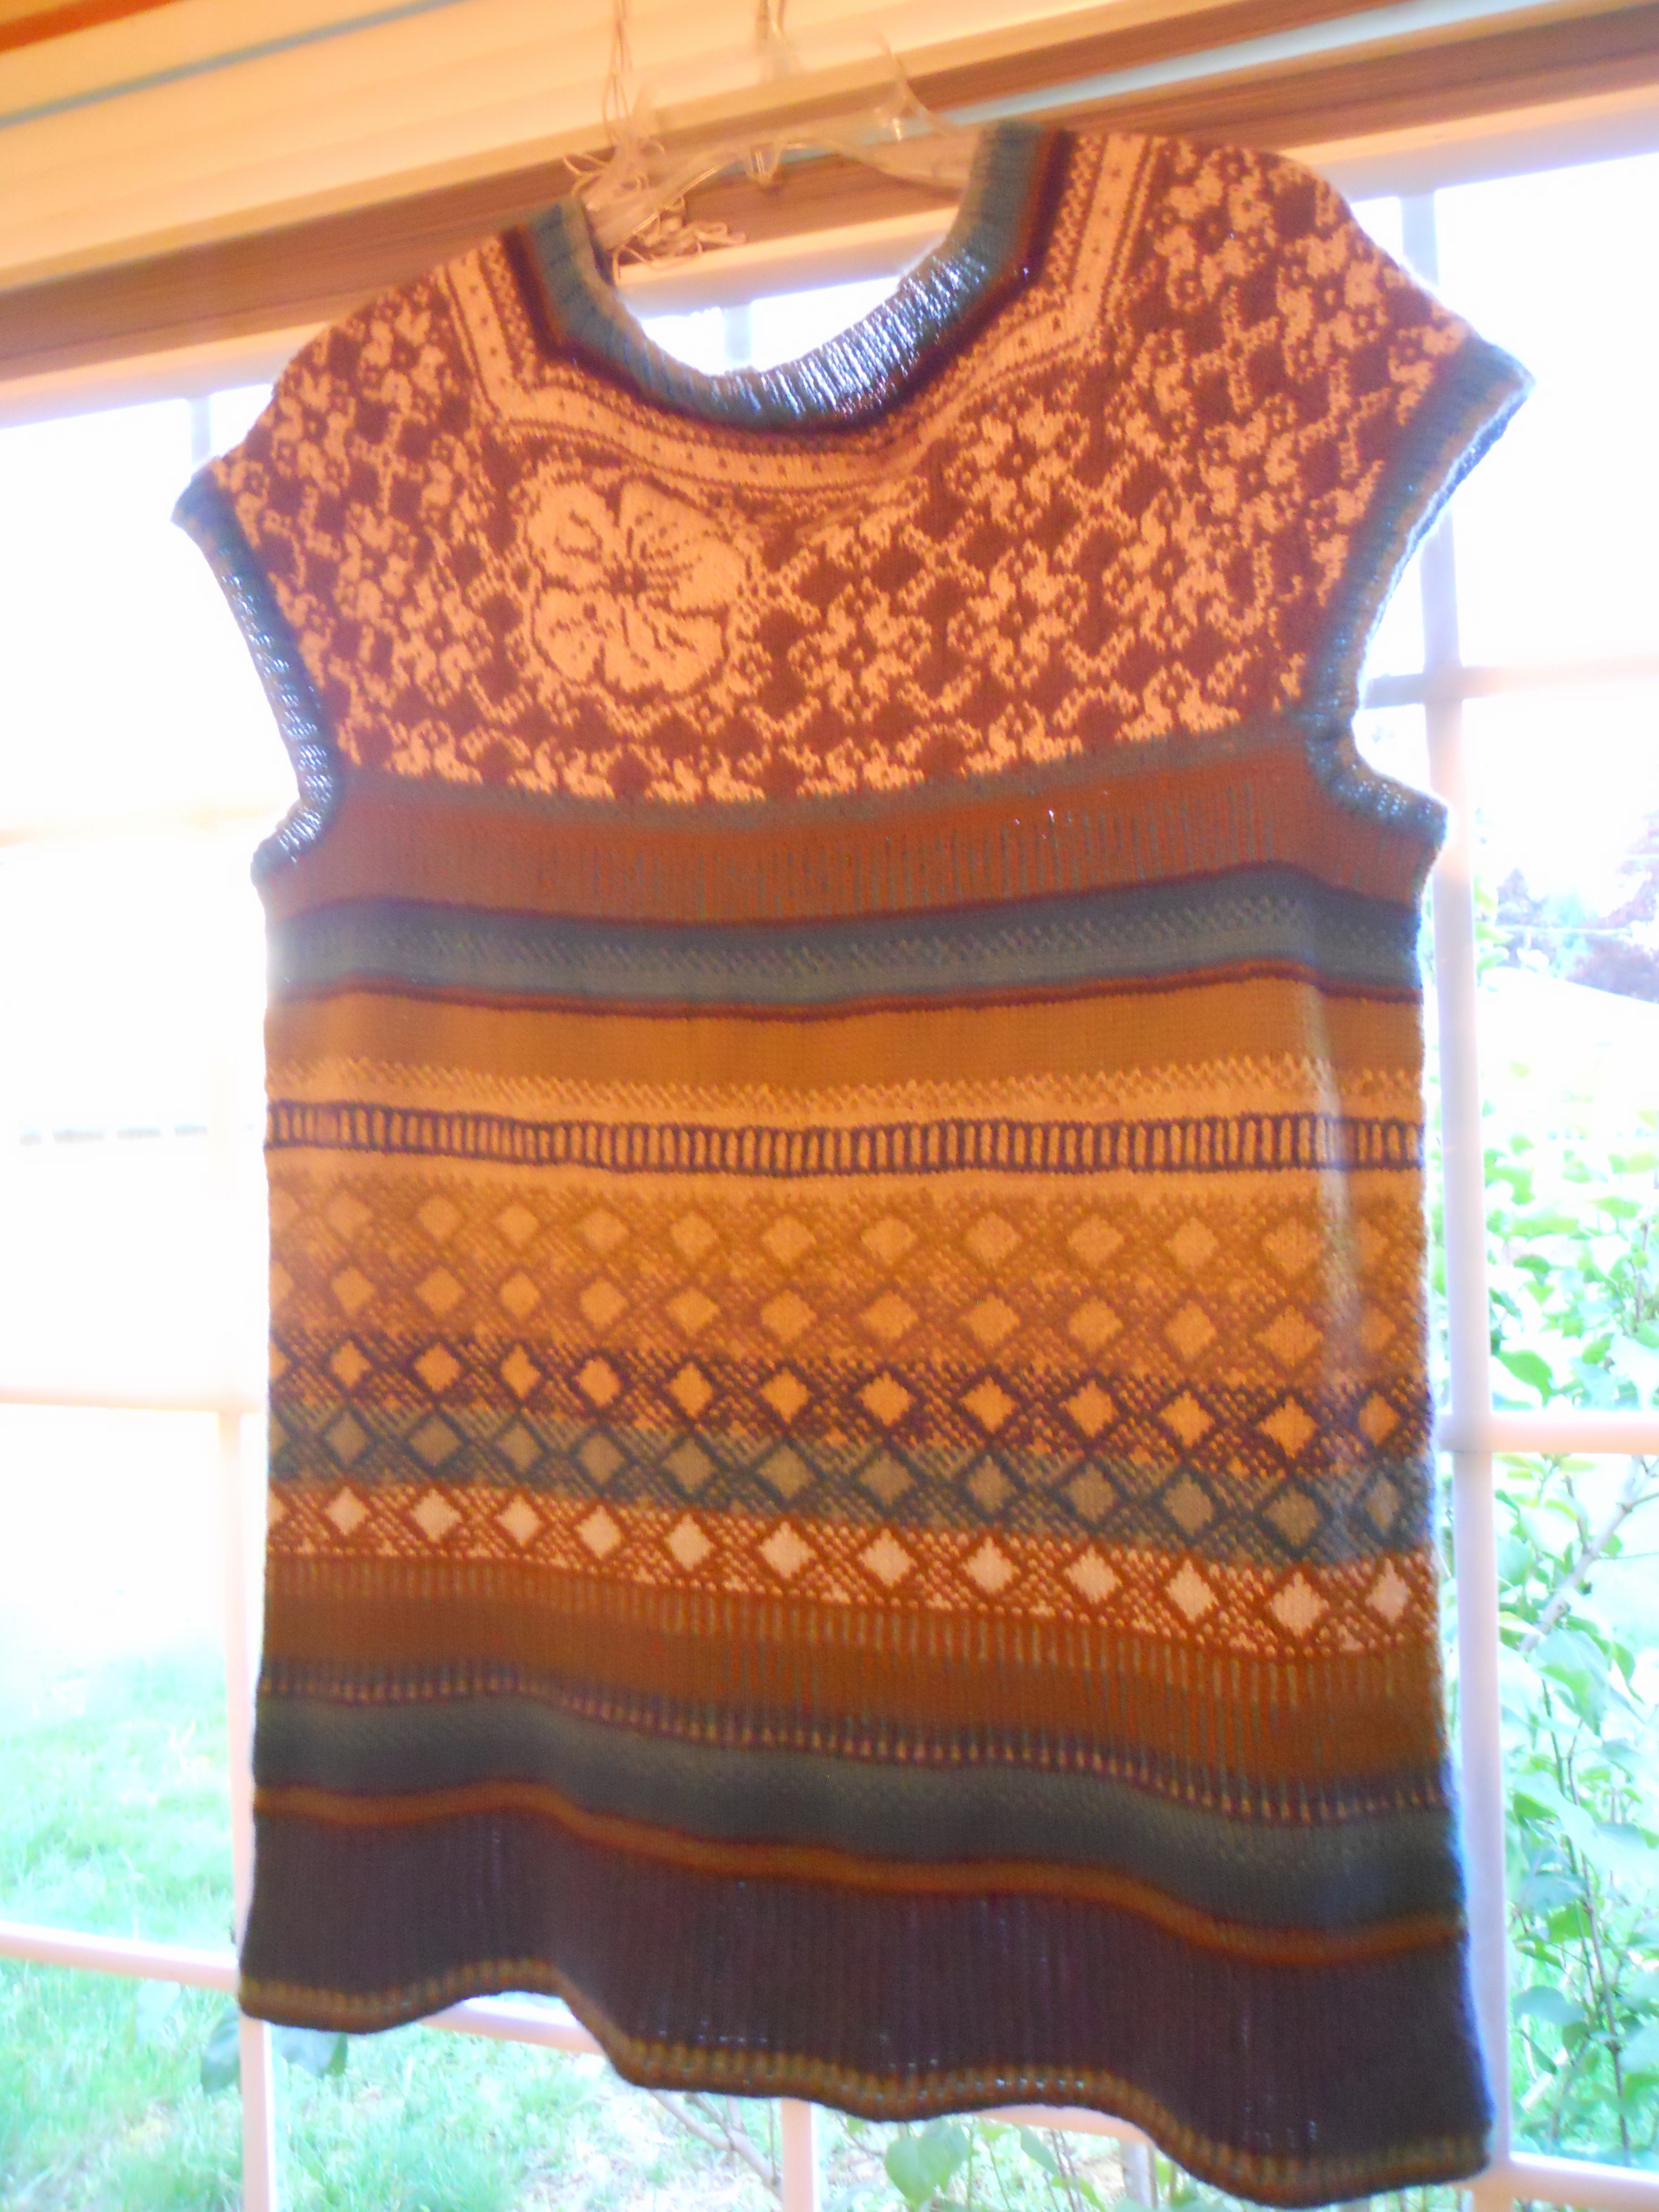
The Finished Product
I’m excited to share some much more professional looking photos soon, but here’s the sweater right after blocking.
And that’s how I grafted 312 stitches and lived to tell about it!
The Salishan Cowl is another pattern which lends itself to a look into the design process. In this case, it was a matter of being immersed in a place as well as spending time pondering the building blocks of knit design, the stitches.
The place:
I’ve lived in Oregon for 25 years now, and have known of the Salishan Spa & Golf Resort since shortly after we moved here. I’ve driven by it numerous times, but it wasn’t until last August that I finally stayed there.
When I arrived, I wasn’t sure what to expect. I found that the grounds were quiet and peaceful. The room was spacious; there was a choice of restaurants and the food was delicious. The atmosphere was that of a mountain lodge even though the ocean was within walking distance.
This was to be one of my retreats at the beach, where I spend time knitting, resting, designing. I spent the first few days knitting, taking walks and puttering around. I threw a bunch of yarn (collected over the years) on a table, hoping that color combinations would jump out at me and inspire some designs:
The yarn led me down dead end paths. Perhaps they were dead end at the time and may yet lead to new designs. Time will tell.
As it turned out, though, the inspiration came from the place itself.
The resort is situated so that the lodge, restaurants and accommodations are on the east side of Highway 101. It’s about 1/4 mile walk from the rooms to the highway, which you cross to the golf course, spa and shops.
There’s even a lovely yarn shop in The Shops, In The Wind Yarns. It was new to me then, but now it’s a must-stop place whenever I go to the Coast. I love to visit and see all the new things they are working on and what new yarns they’re bringing in. There’s always something fun going on!
But I digress! At last I was going to explore the Salishan Spit, which I had always been curious about. Viewing across the Siletz Bay from Highway 101, there is a thin slice of land with houses on it. How does one get there? During my stay, I learned that The Spit is accessible by car only to residents of the gated community or to guests of the resort. Otherwise, it may be accessed by foot on a trail which begins next to the shops and golf course.
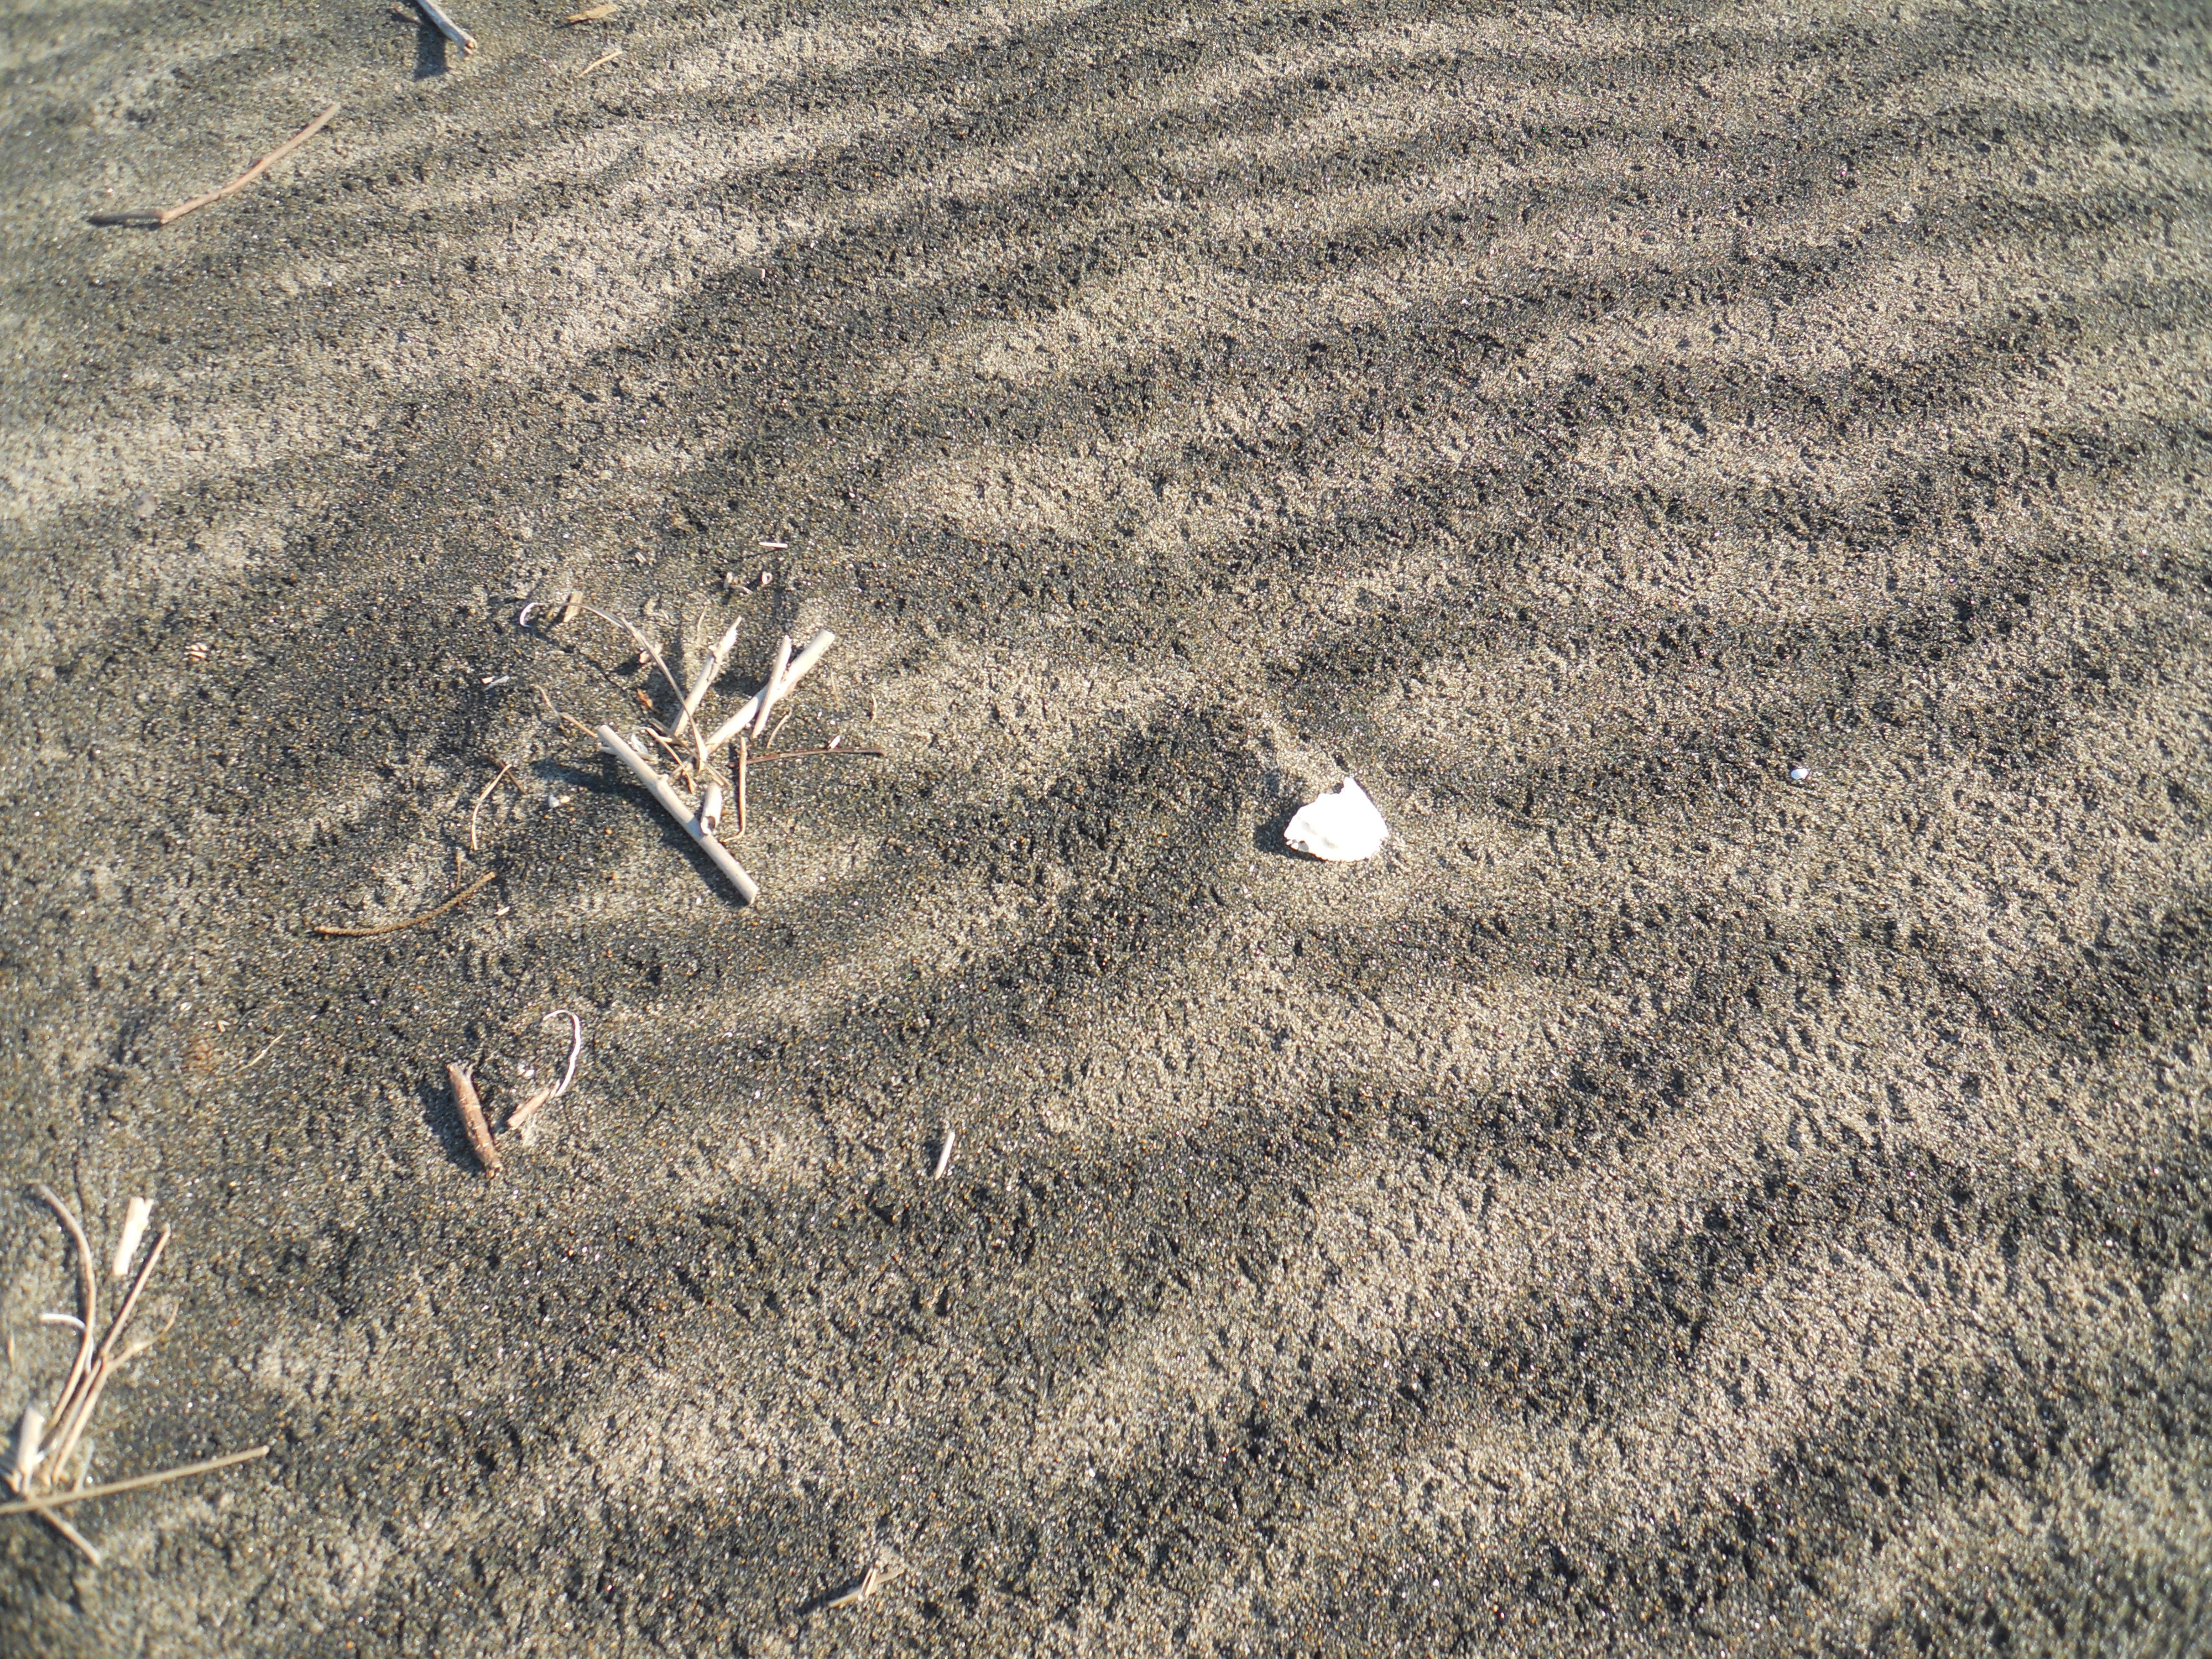
It’s a long hike to traverse the length of the spit. As I approached the end of the spit, I turned a corner and was shocked to discover that we had black (or dark gray) sand on an Oregon beach! It was one of those amazing moments when you find something completely unexpected. I had absolutely no idea we had a dark sand beach in Oregon.
You can see the dark sand over the light here:
And these organic shapes and lines:
It was all hauntingly beautiful.
The building blocks:
Also during my stay at Salishan, I spent time poring over my stitch dictionaries. One stitch in particular, the Japanese Feather, struck me as very beautiful and elegant. An added bonus: as far as lace stitches go, it’s pretty straightforward and easy. And it’s apparent to me that my subconscious zeroed in on that stitch pattern as a representation of all the lovely lines and shapes I had seen during my wanderings – even including that “S” in the Salishan signs.
The process and the pattern:
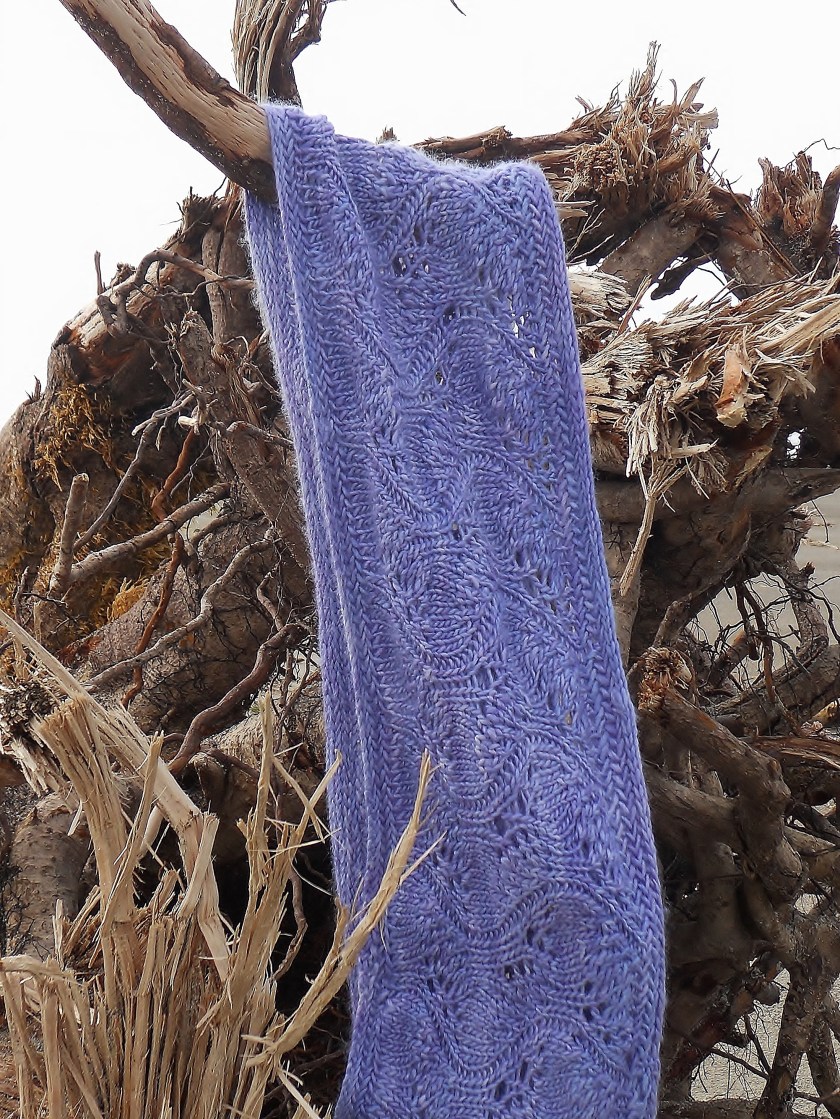
During the next six months, the impressions from Salishan and the thoughts of that stitch remained with me. Sometime in December of 2014 or early January 2015, I found the perfect edging for the cowl: the Herringbone Stitch. It would create a pleasing contrast of a highly structured edging with the organic shape of the Japanese Feather. Additionally, it was a stitch that wasn’t being used by a large number of designers, so it would create a unique look. And finally, it’s a fun stitch to work, albeit time consuming.
The pattern also includes the option of working a Seed Stitch border. It is easier and quicker than the Herringbone Stitch border, and it still creates an elegant look.
Worked in Malabrigo Silky Merino, this cowl just floats! It also is lovely in Rowan Felted Tweed.
This luminous Salishan Cowl in the window at In The Wind Yarns was made by Janet
This design is really one of my favorites. Not only do I feel like a million bucks whenever I wear this cowl, but I have the treasured memory of finding this beautiful and unexpected, somewhat hard-to-reach beach, which I hope to visit many, many more times in the future.
I’m very fortunate that another designer lives in the same small town where I live. Actually, we counted four, but that’s a story for another day…. I’m even more fortunate that this designer is my friend and that we love to get together. We have such a good time chatting about anything and everything, particularly about designing, creating, knitting and yarn. This friend is Marie Greene, of Olive Knits.
Marie, me
Some time back, we started thinking about how we could collaborate on a project. Could we write a pattern e-book based around a theme? We set up Google pages and a secret Pinterest page. It’s one possibility. Limiting factor: time.
A couple of weeks ago, Marie had a flash of inspiration. What if we each brought three items and put them together in a collection of six? Then we each would look at the collection and see what it inspired in us. I loved her idea! We would have our own Designer’s Challenge!
It was really fun choosing my three items. I considered a sea shell, but since we both had already discussed how much we love the beach and the ocean, I decided that would be too easy. I saw a giant, lovely artichoke at the grocery store, and I loved it, but there were too many days yet to go, and I worried that it wouldn’t keep well. In our home, we have a fabulous print I found a few years ago at the Salem Art Fair of glass bricks in a sidewalk. I love the colors and the texture. Too big.
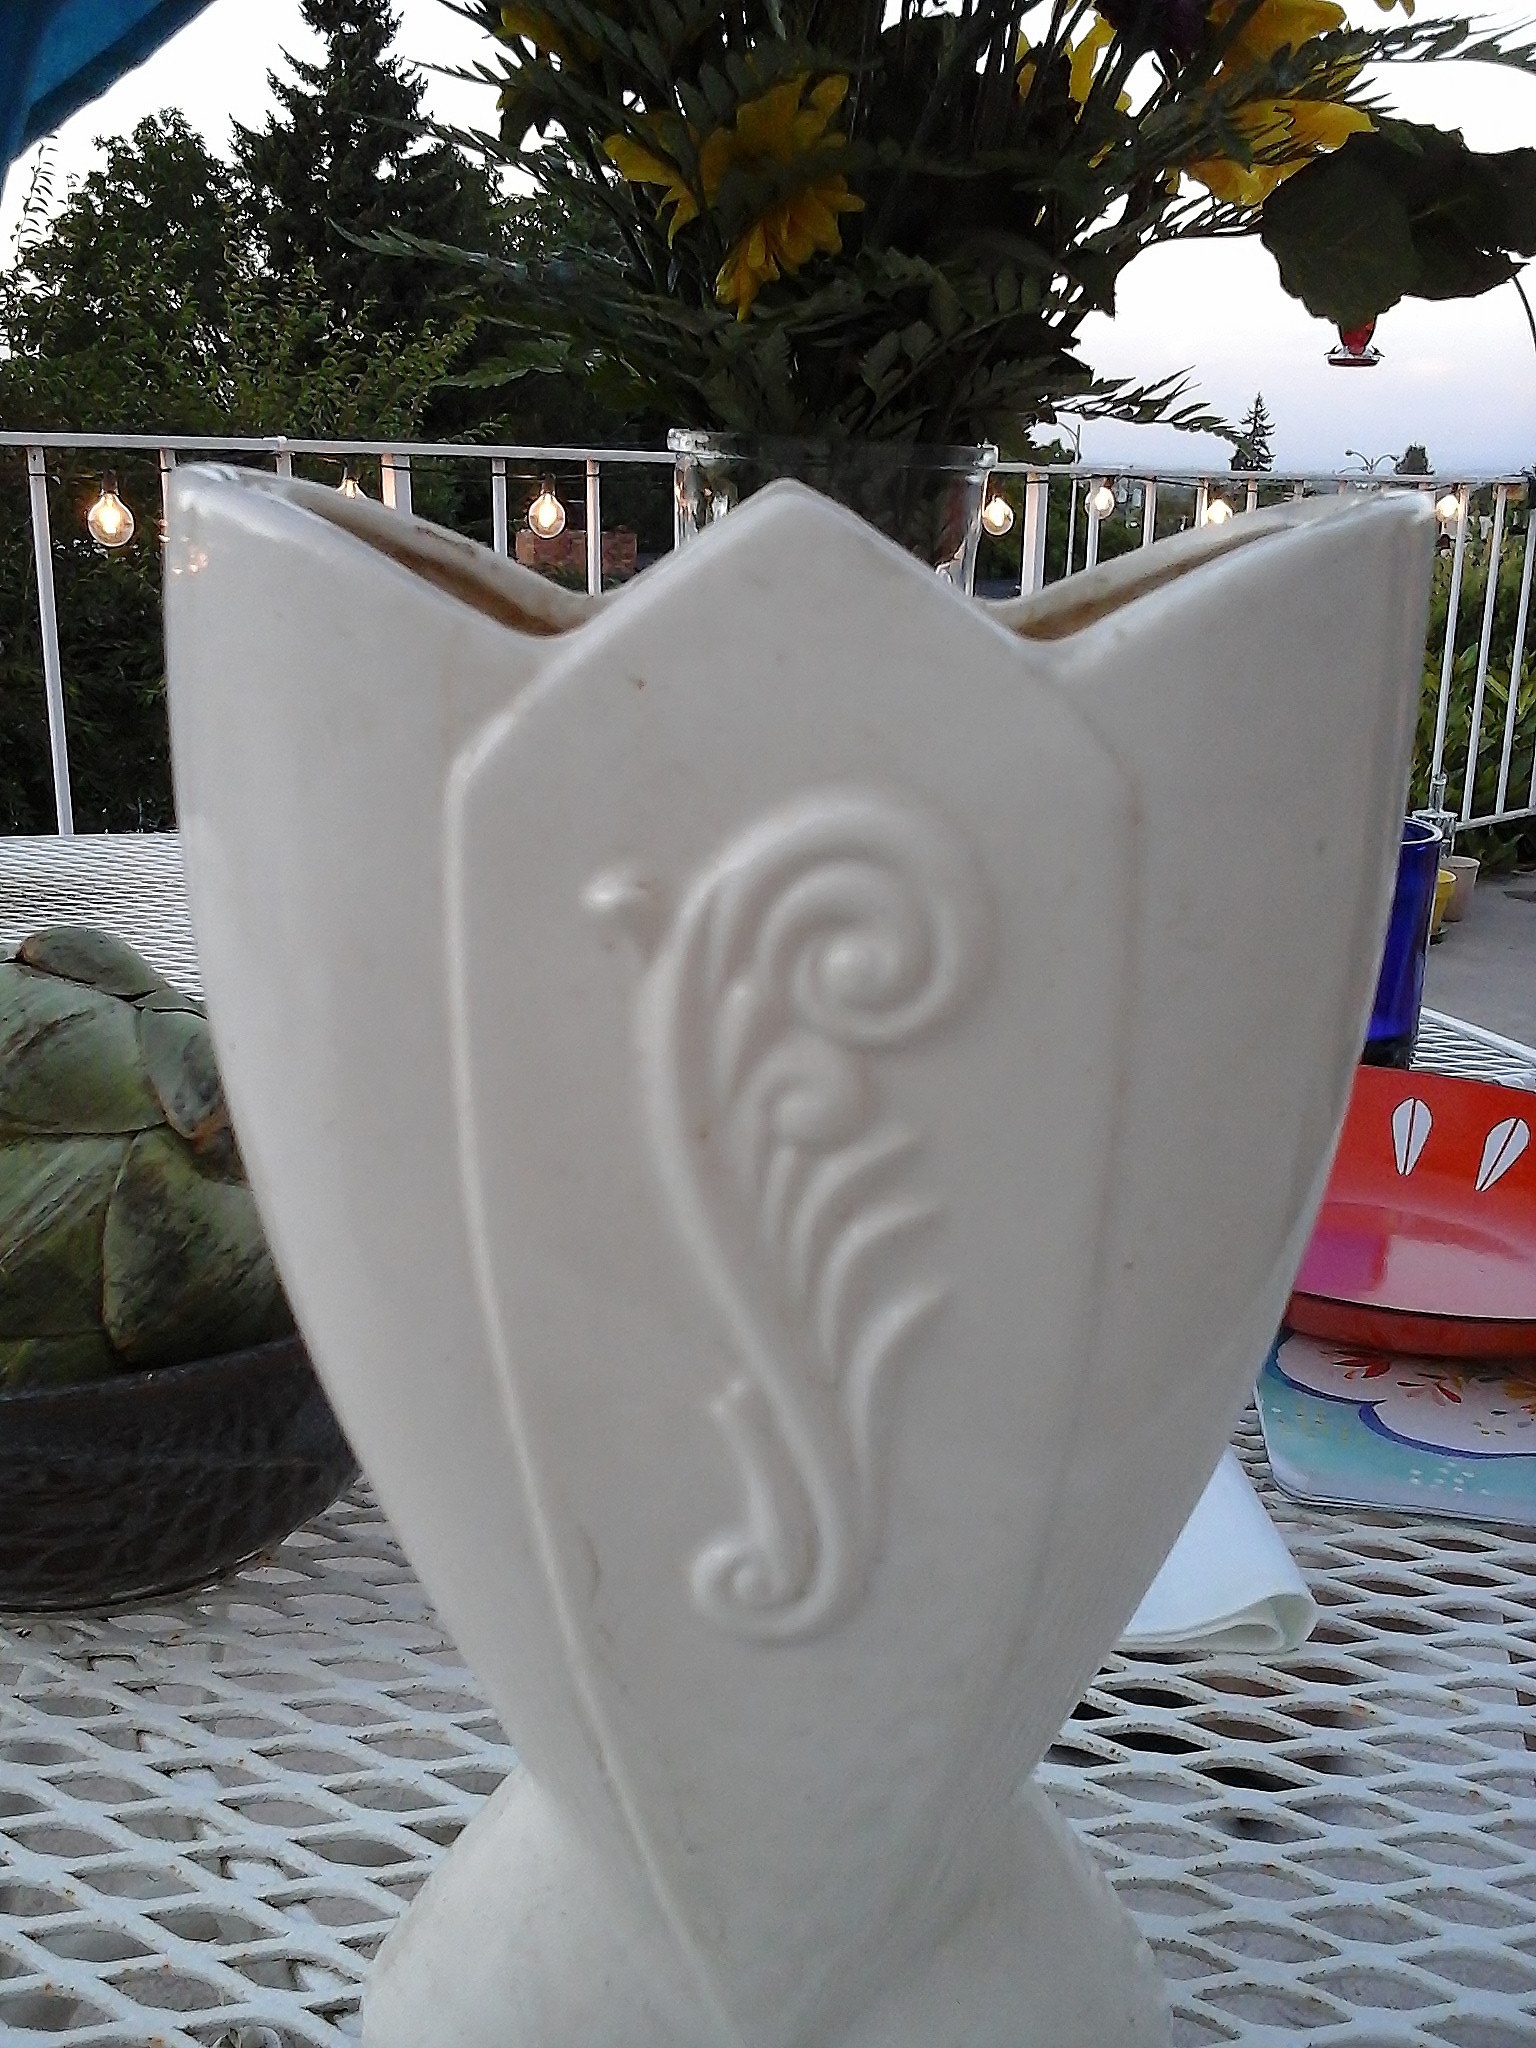
First I settled on an Art Deco (or Art Nouveau?) vase which was my mother’s, and either her mother’s or my aunt’s before her. I believe it is from the 1920’s.
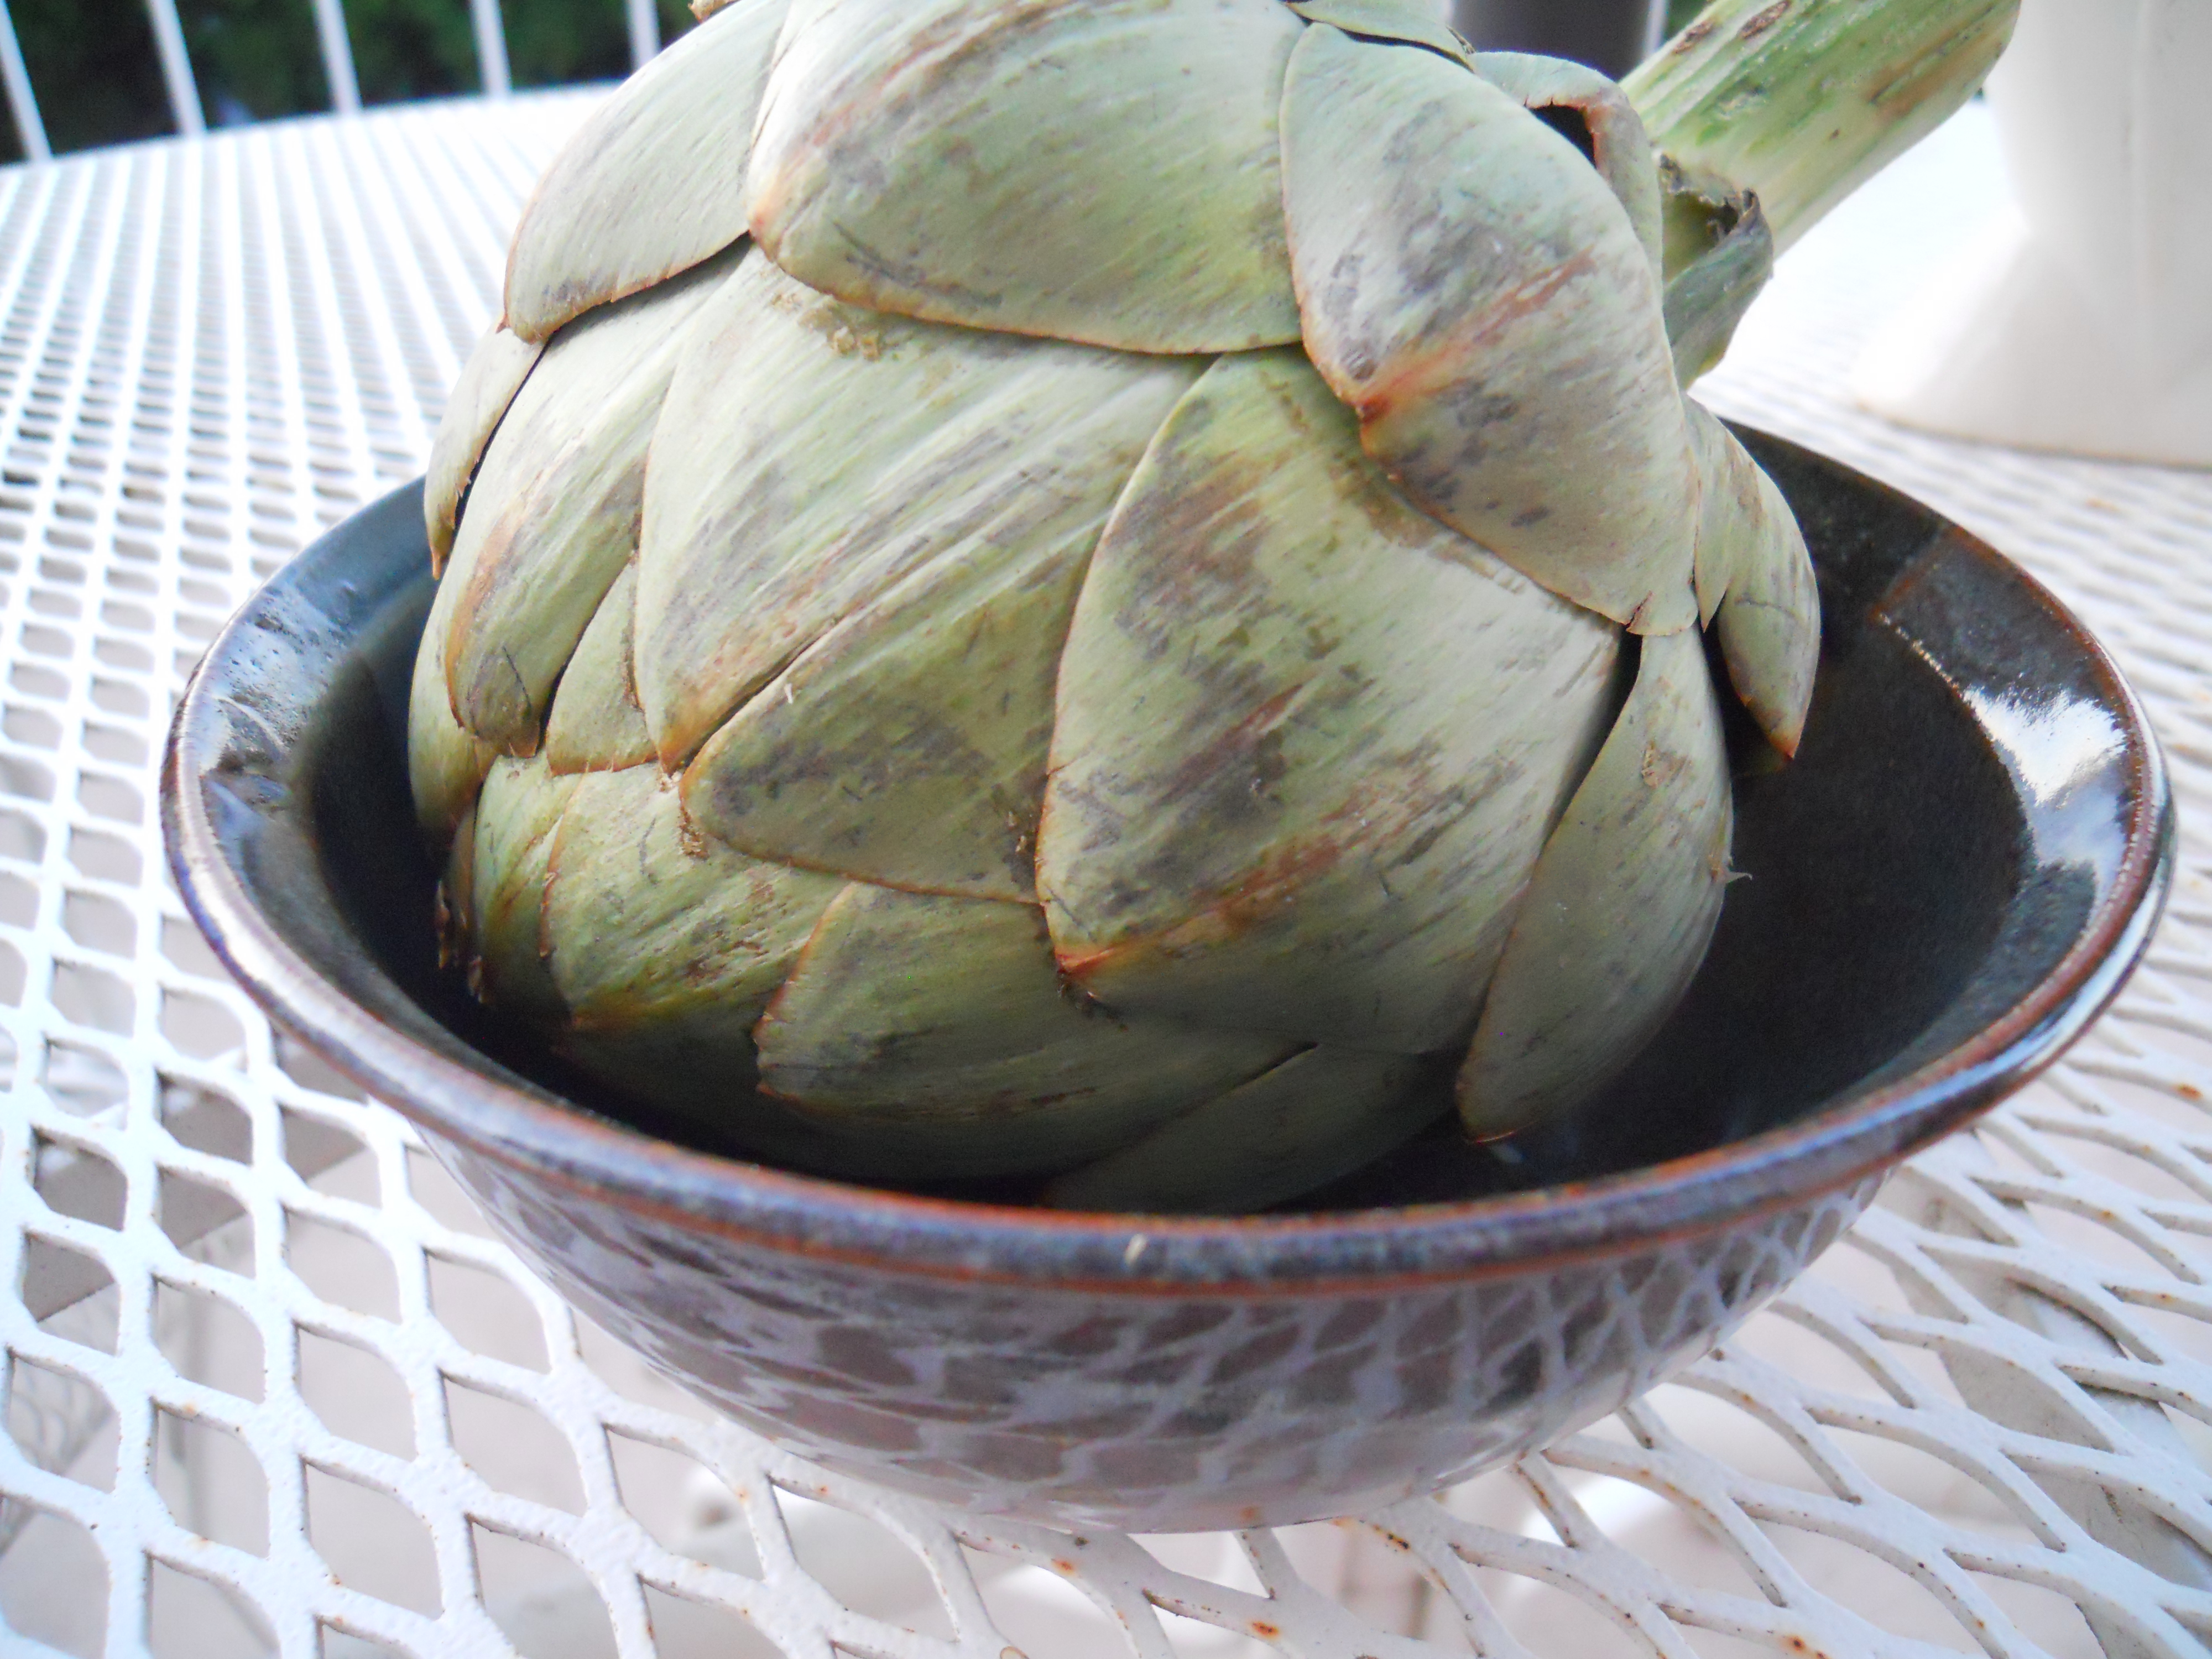
My second item was a hand thrown ceramic bowl I found at the Empty Bowls sale. Local potters create thousands of bowls (last year, 1,400) which are then sold, and all of the proceeds benefit our local food bank. It’s a wonderful national grassroots movement. I just love the bowls I’ve purchased over the years!
And finally, even though the huge artichokes were not to be found when it was time, I found a smaller yet perfectly acceptable artichoke for my third item. Such decorative color and line!
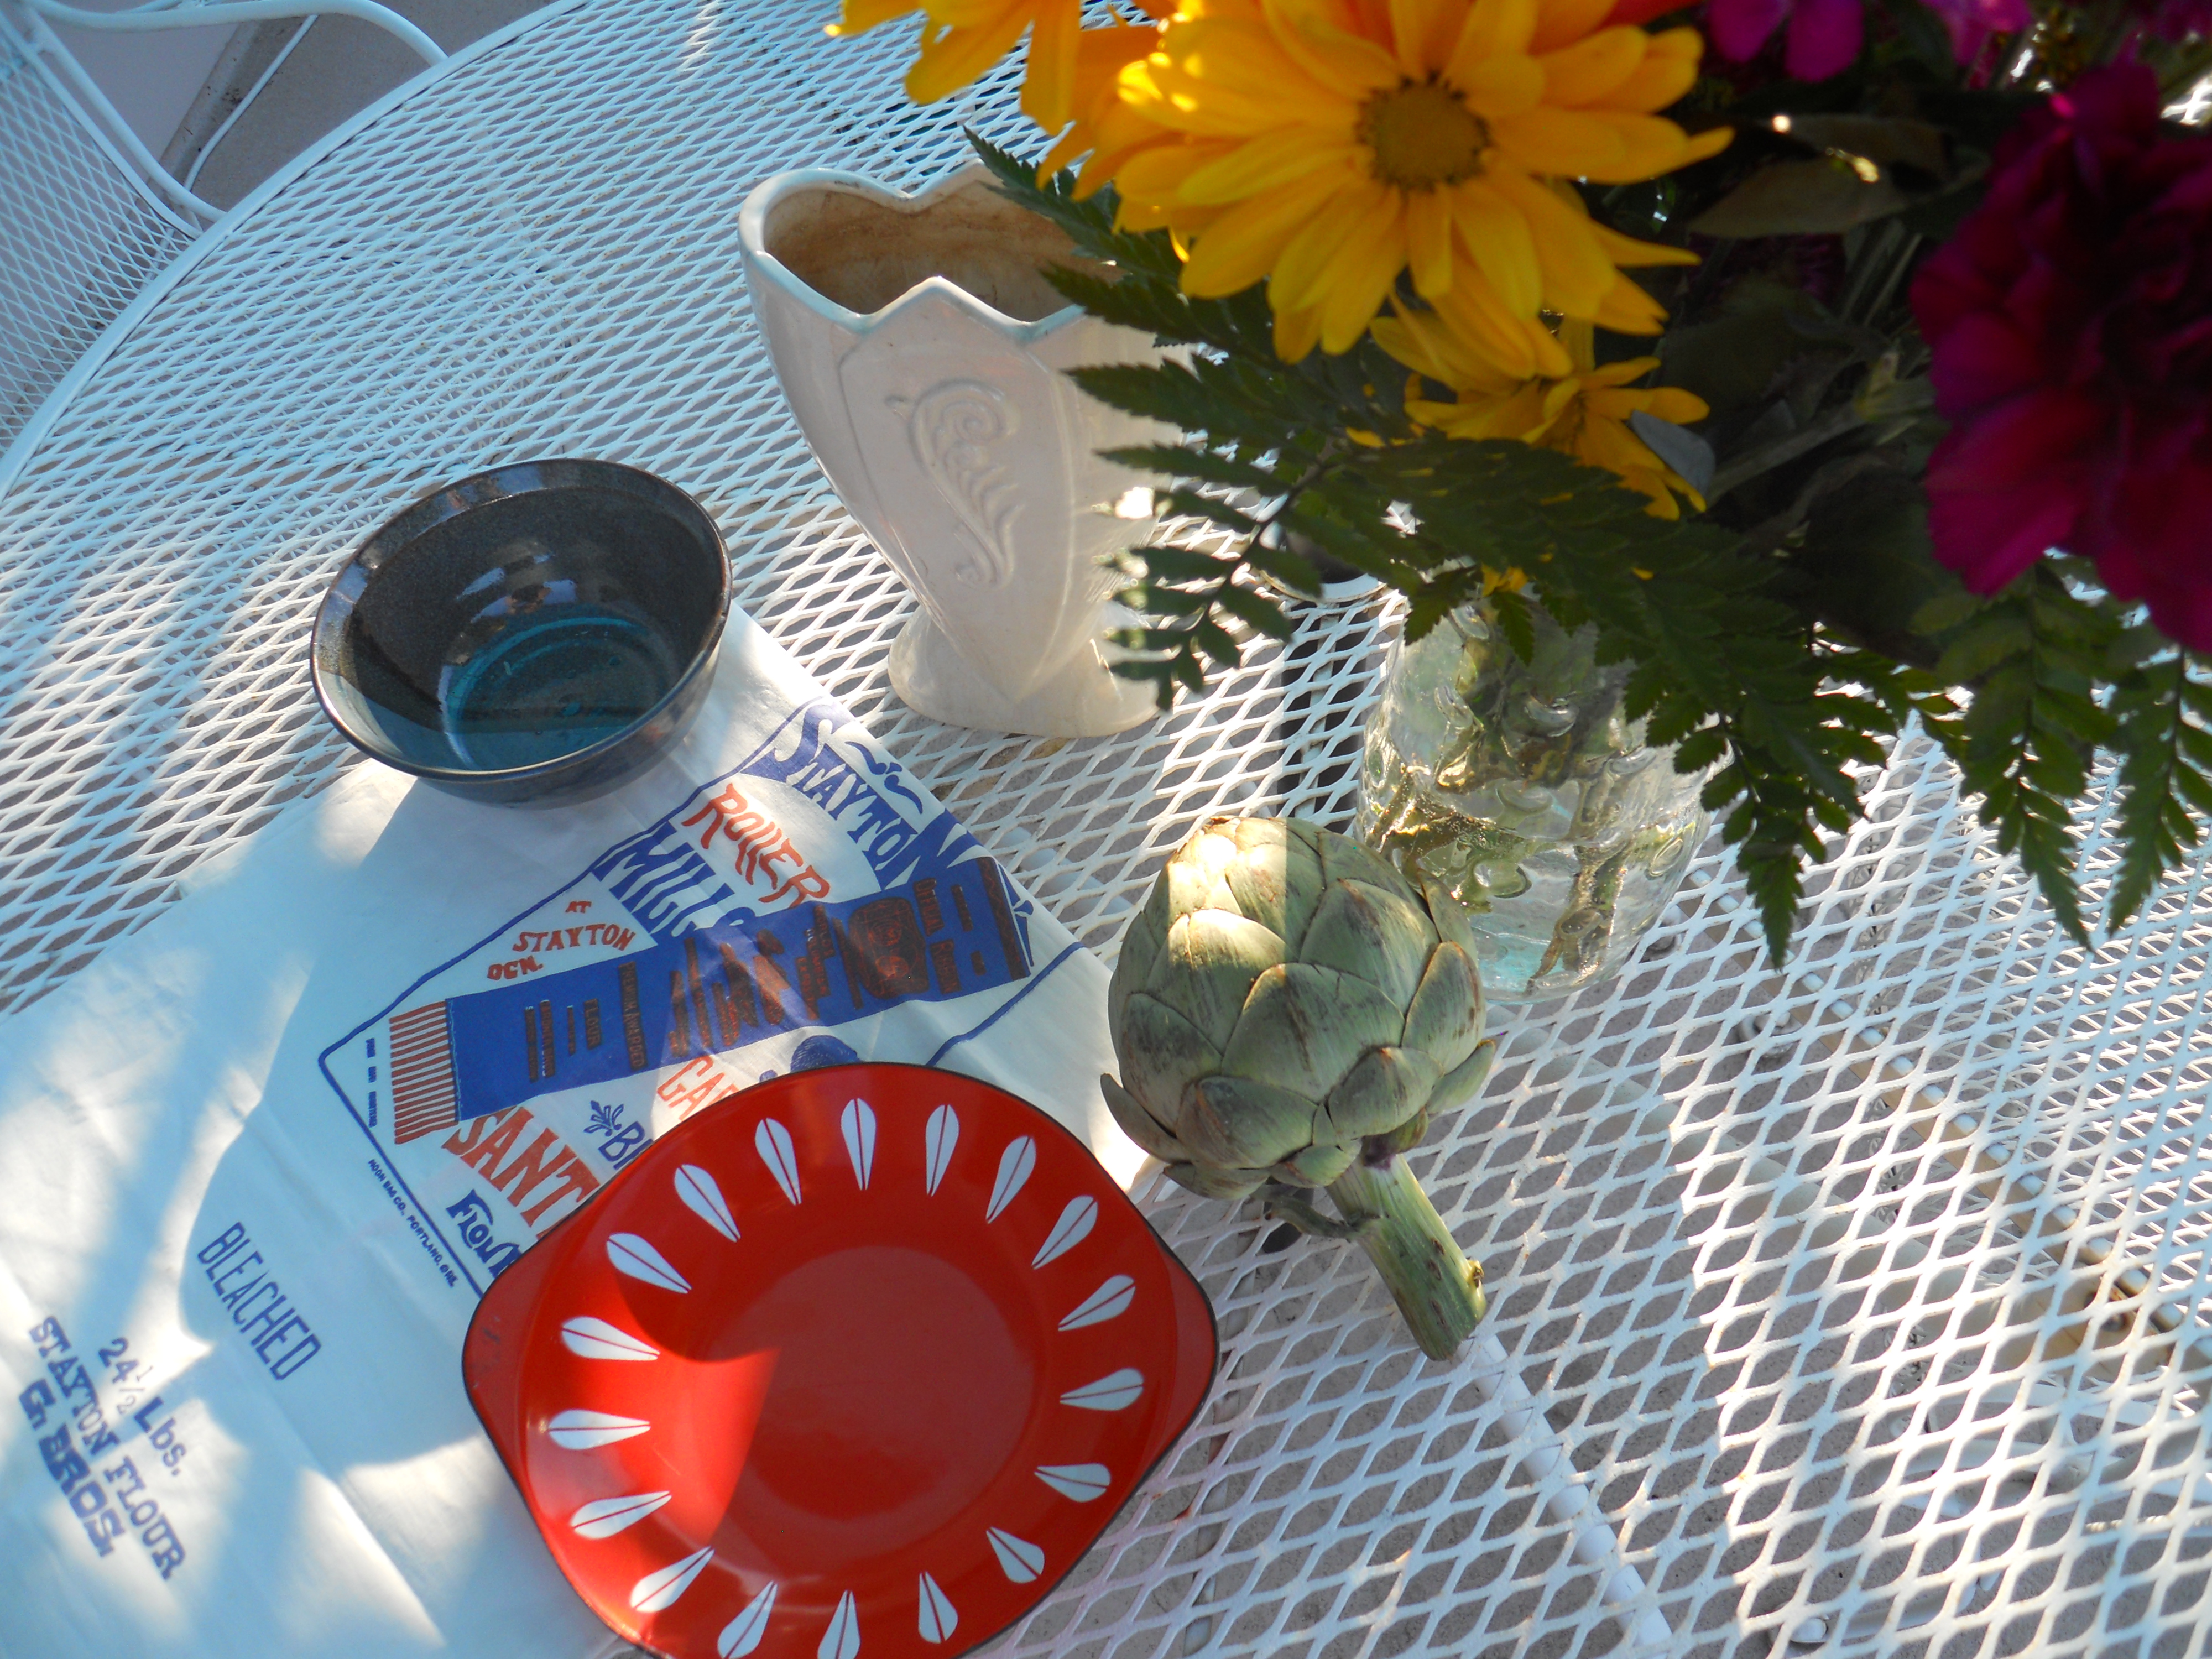
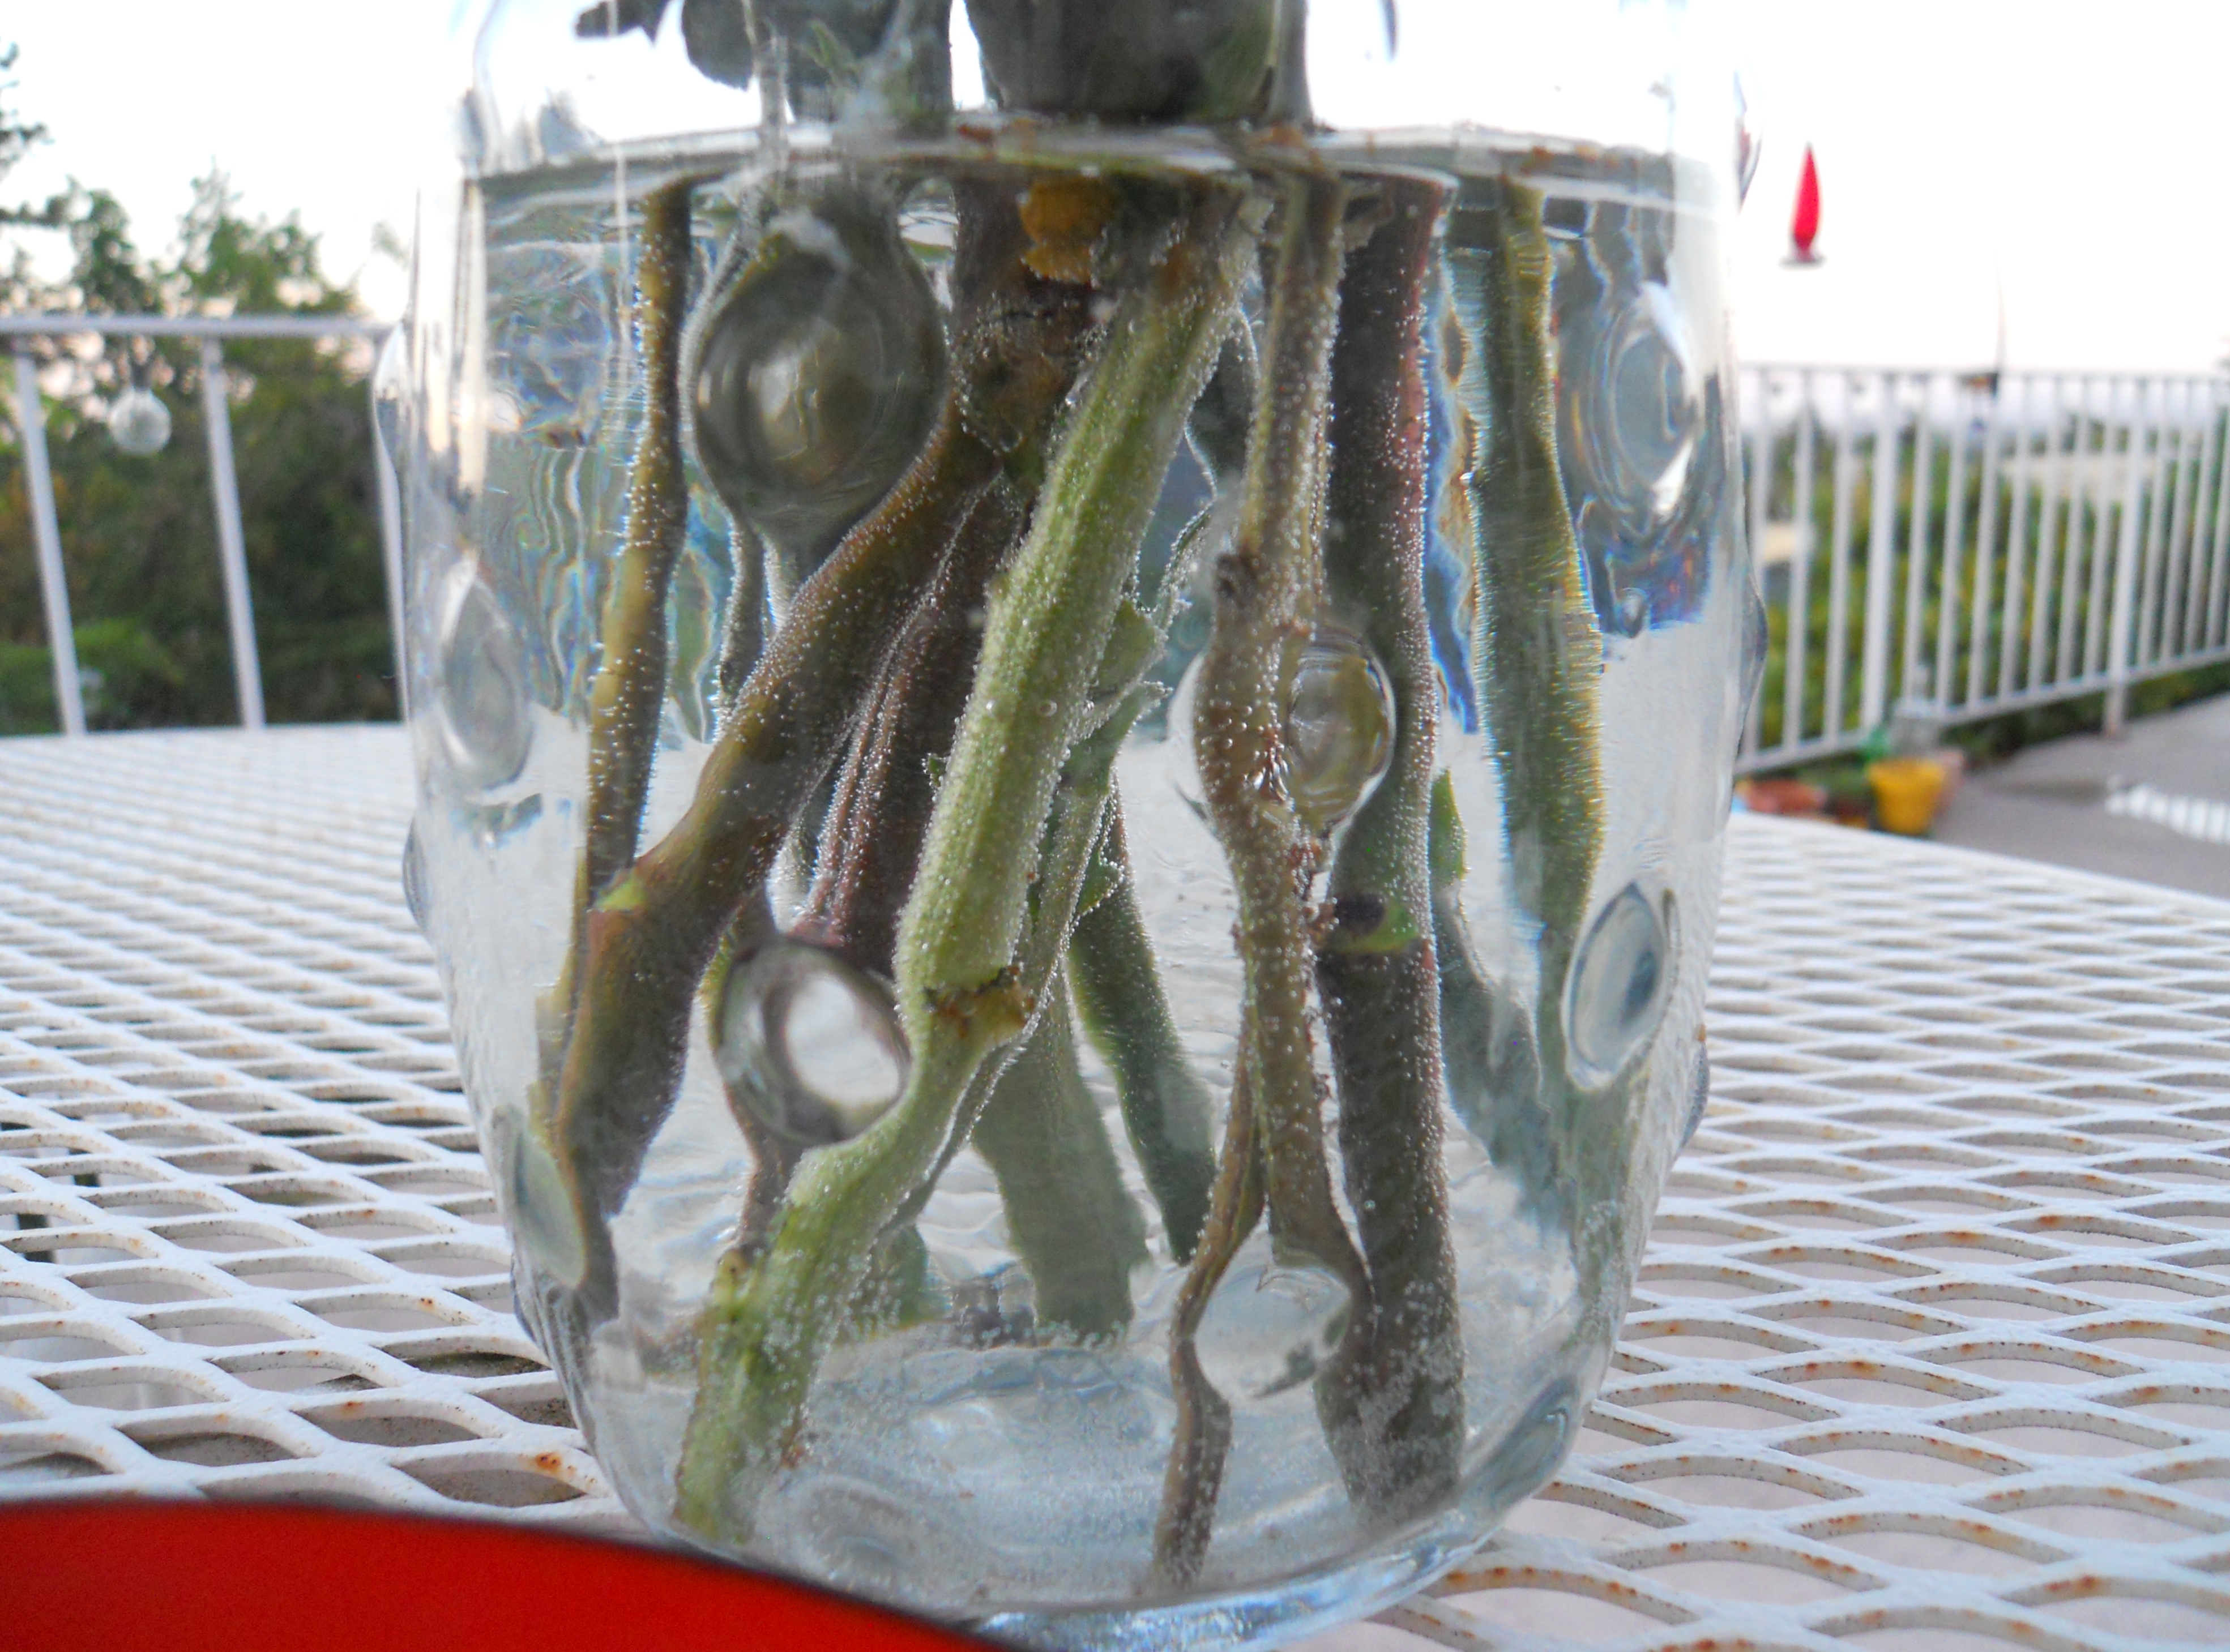
Marie’s items were a plate from the 50’s in a fabulous orange with a fun and interesting white decorative shape, a jar of flowers, which become even more intriguing as we looked carefully at the colors and textures, and a crisp white flour sack towel – local, with orange and blue printing.
I’m so intrigued to find out where our experiment will take us. What elements will carry through to each of our designs? What commonalities will our designs have? I am confident that we’ll each come up with a unique design, and I also know that no matter the result, we are having a blast!
Check out Marie’s blog for her impressions about our collaboration!
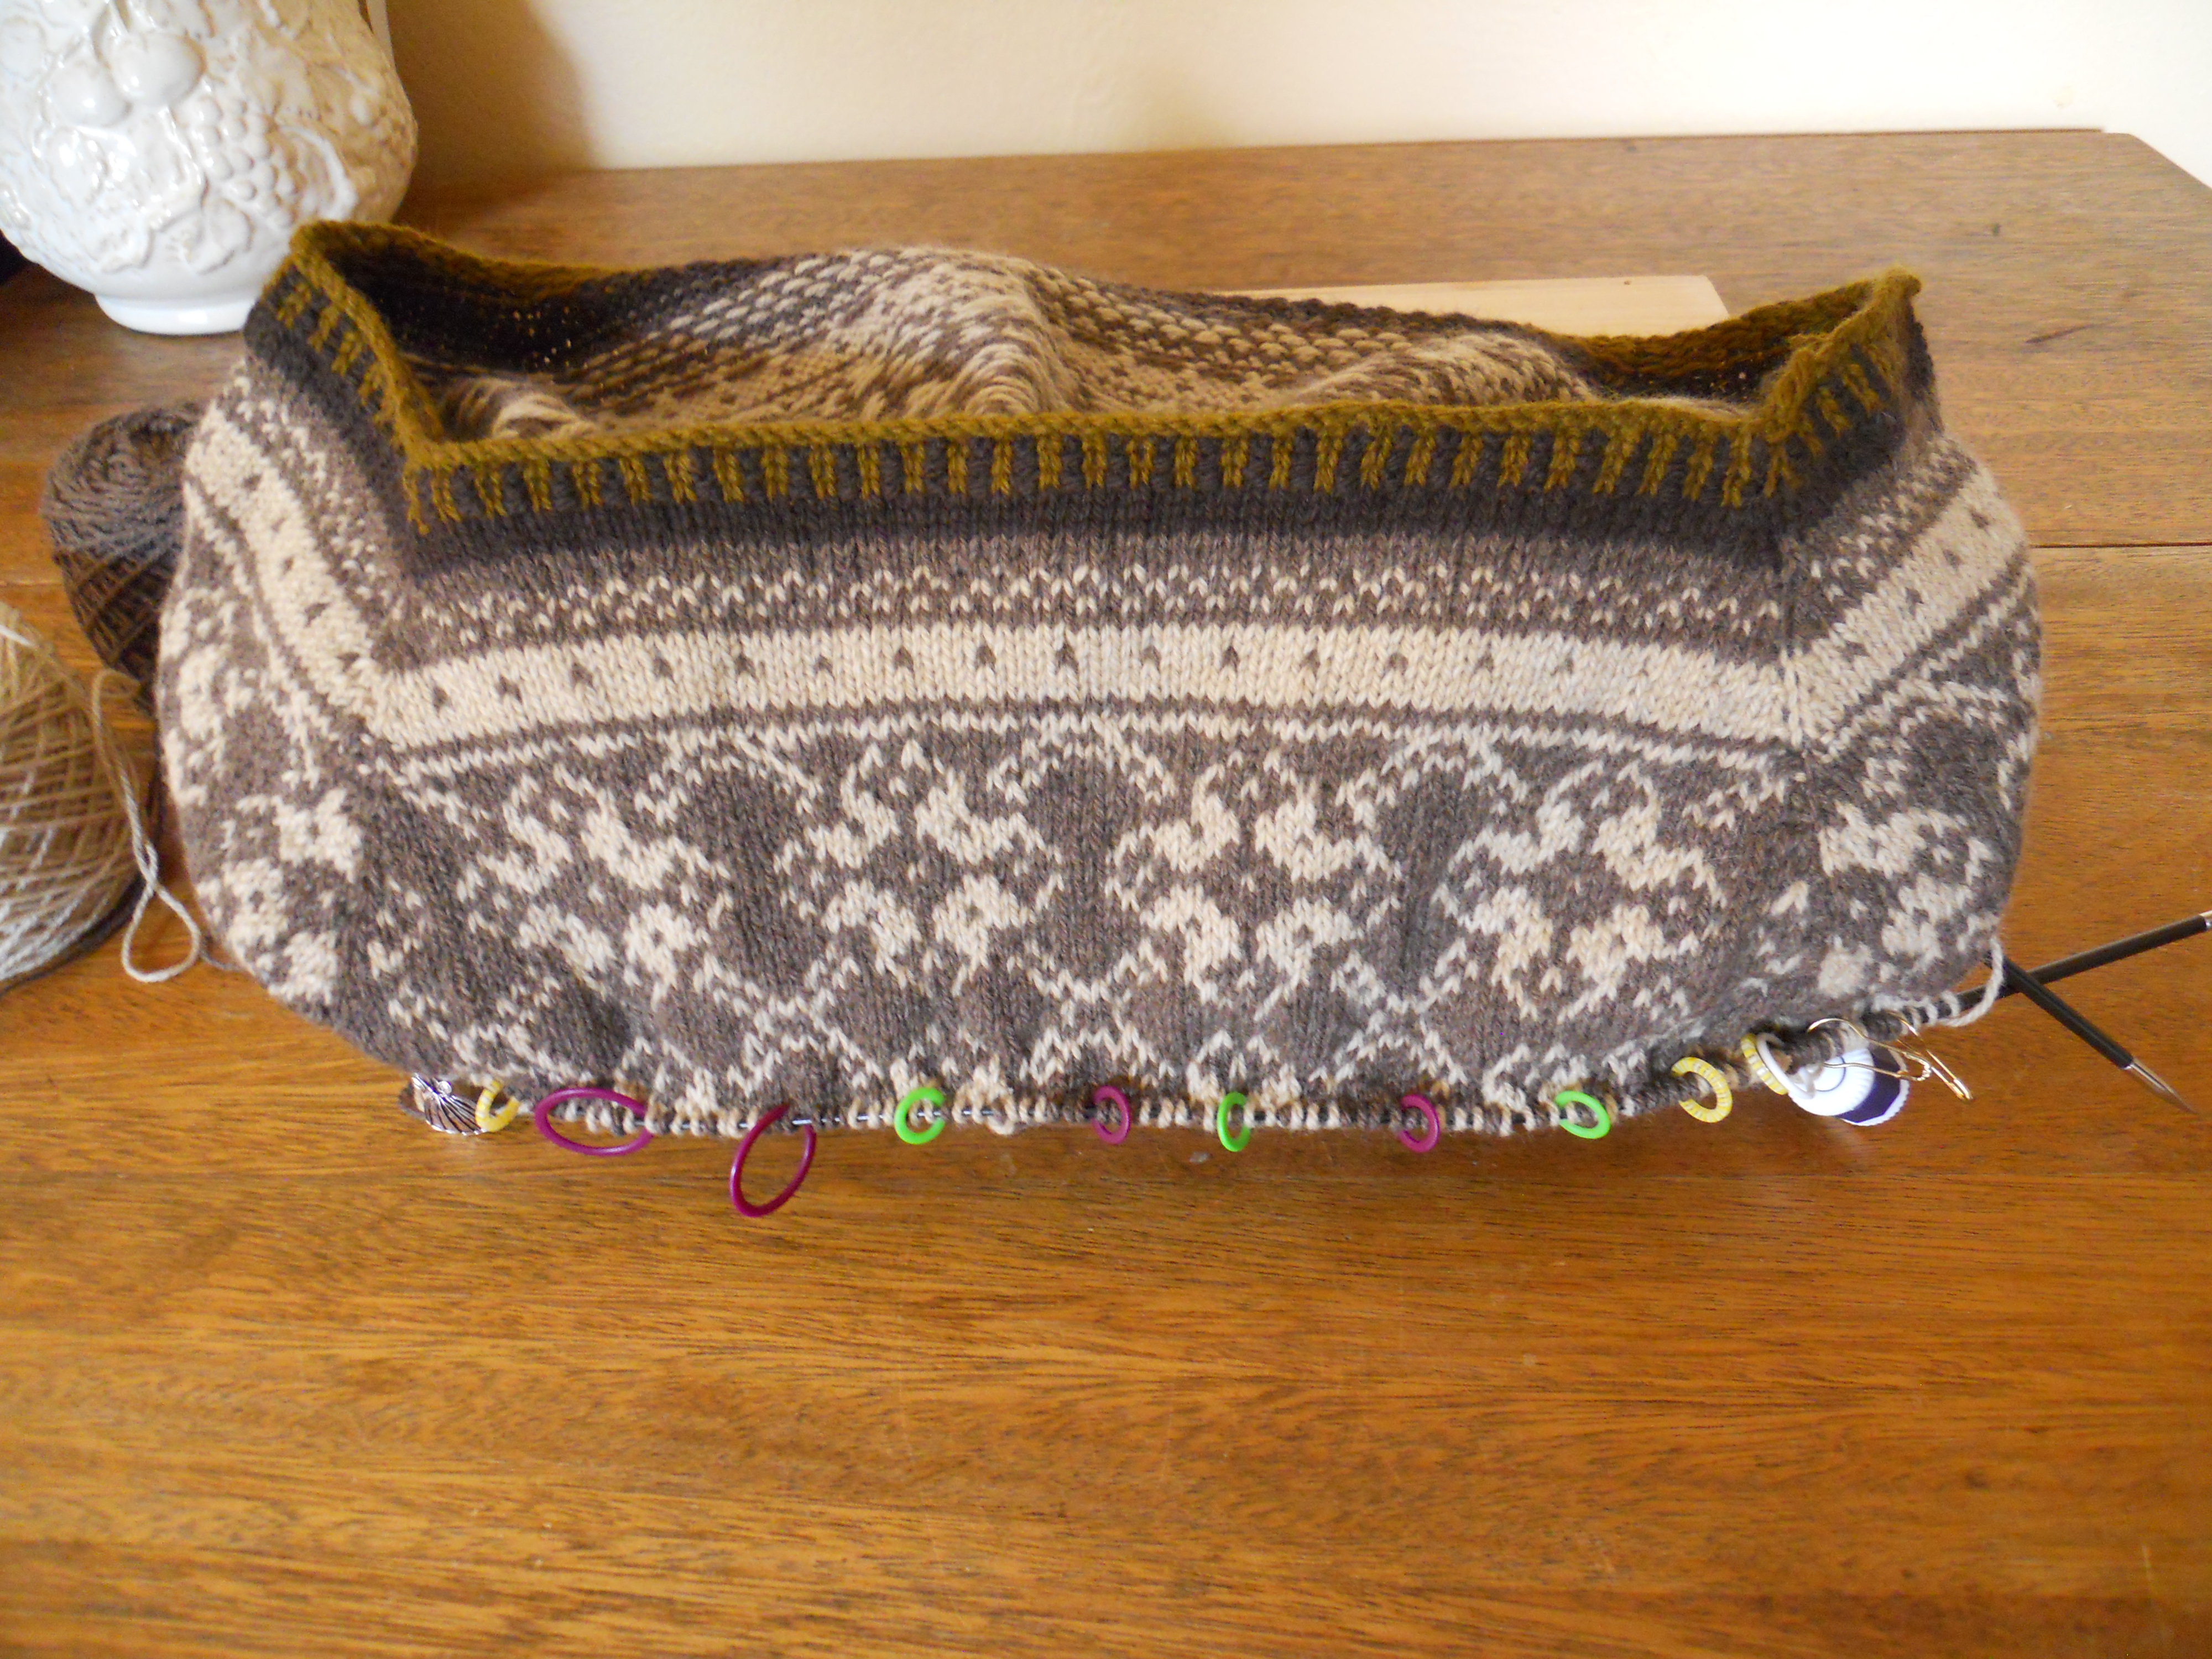
I’m pleased to report that progress is being made on the colorwork tee design I’m working on. Fabric is taking shape!
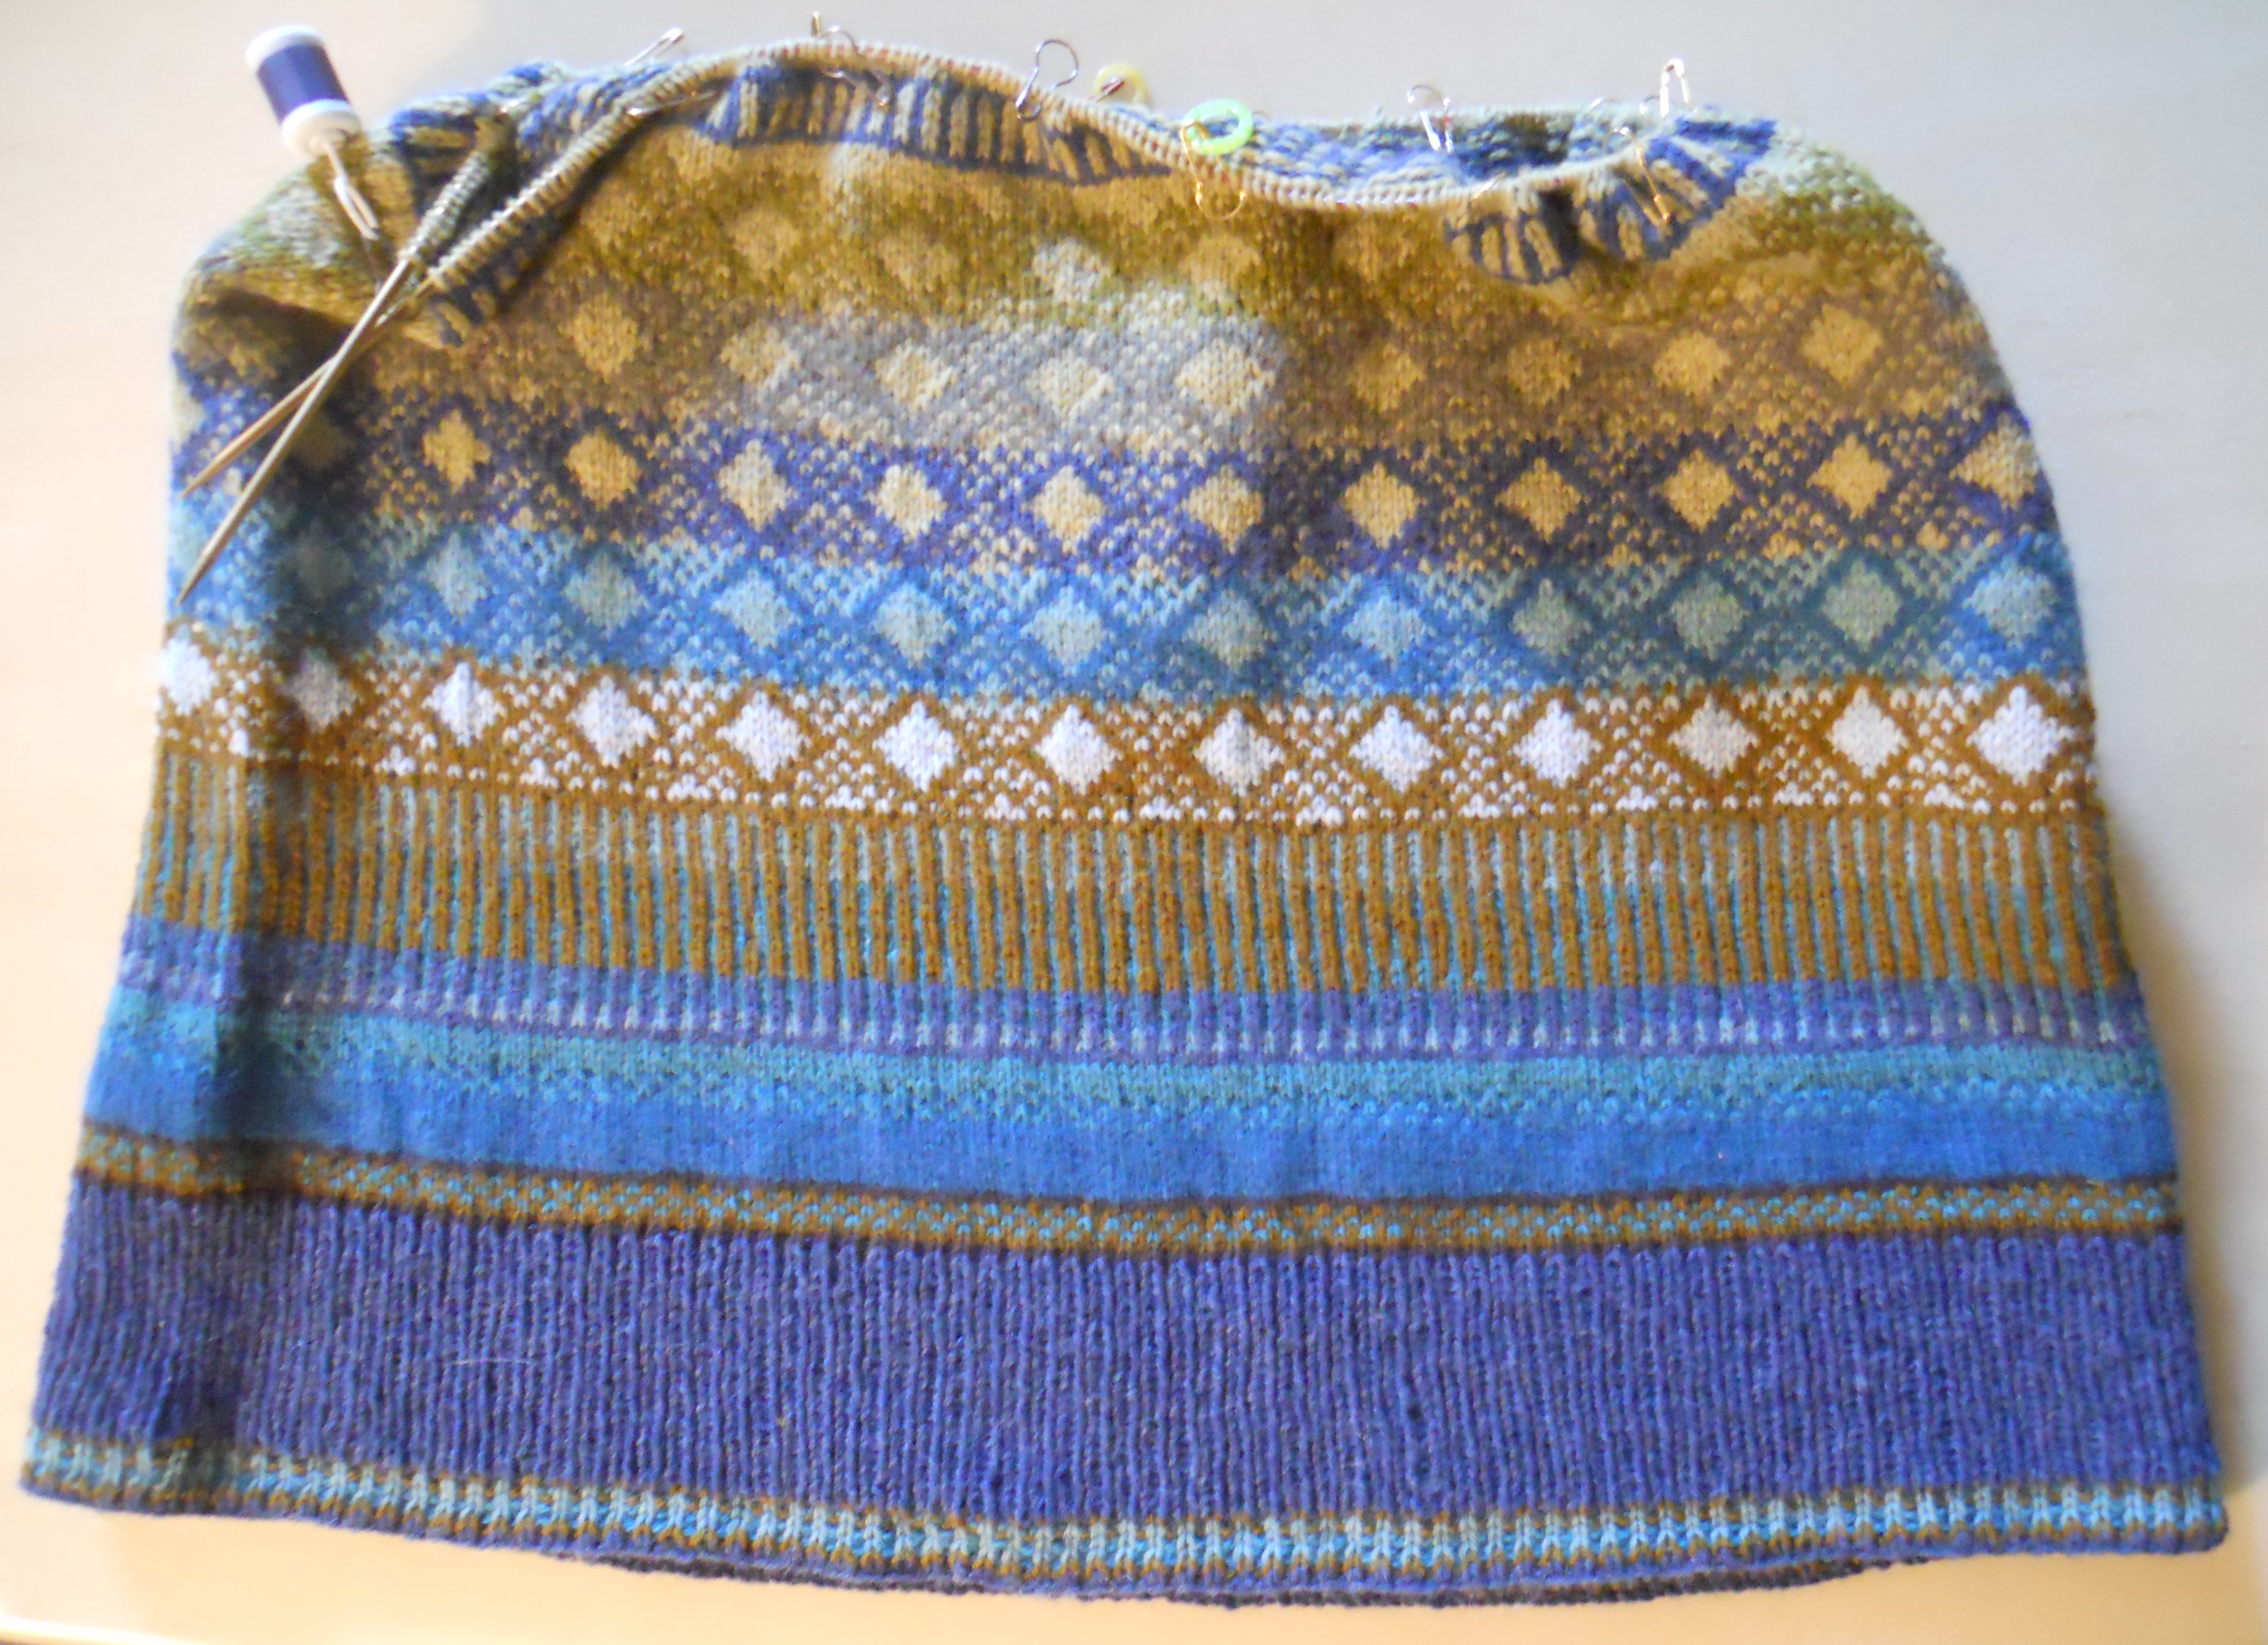
The Sweater
Here is the back of the sweater so far, designed using information garnered from the swatch discussed in What I Learned from the Swatch. Soon the sweater will transition into the Espresso and Carrot colorways (see end of post).
The sweater front is top secret for now (!)
I’m planning to write the pattern in at least three sizes which will approximate women’s small, medium and large. As I get further along, I’ll know whether I will be able to add in any other sizes. If you are interested in test-knitting, please let me know – although right now, given that the unexpected often occurs during the design process, I don’t know exactly when the test will start. More info to come later.
I’m so excited to see the finished sweater design and pattern! Thanks for taking a look with me!